Managing Results
Selecting Users & Devices for Additional Actions
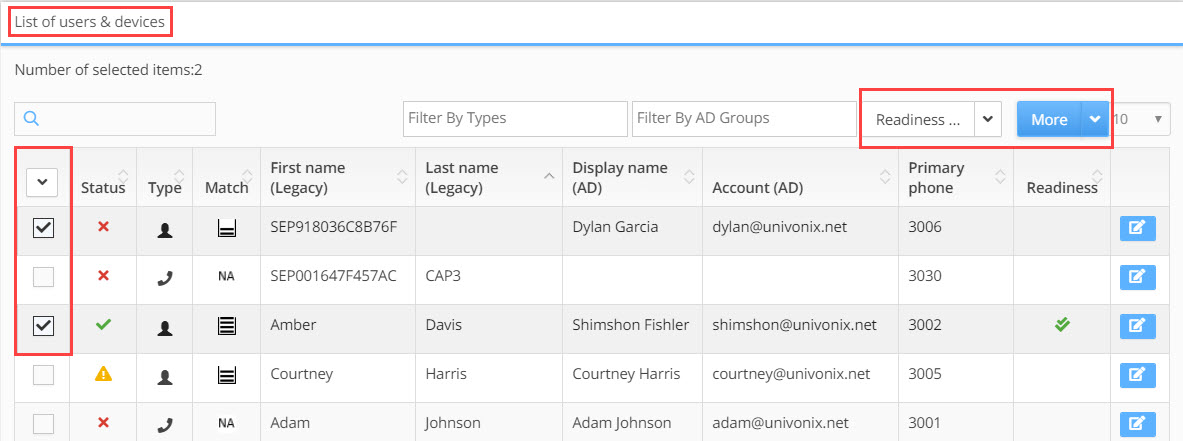
- Selecting Lines: selecting lines allows you to more effectively manage what users and devices to work on, what actions to take on each line and to use 'bulk administration' to complete time consuming tasks on multiple lines at the click of a button.
Selecting lines is done from the left most column in the List of Users & Devices results table. Individual rows in the table can be selected manually clicking in the  box in the left most column of the table at the beginning of every row. To remove a check mark from a box, simply click in the marked box to remove the check.
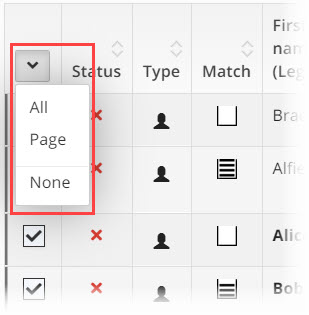
To automaticity mark multiple lines, click the down arrow ![]() button at the top of the check box column. A drop down list opens with three options:
button at the top of the check box column. A drop down list opens with three options:
- All - mark all the checkboxes for the complete results set
- Page - mark all the checkboxes, only for those results that appear in the table on the current open page of results
- None - Remove the mark from all marked checkboxes across the entire results set
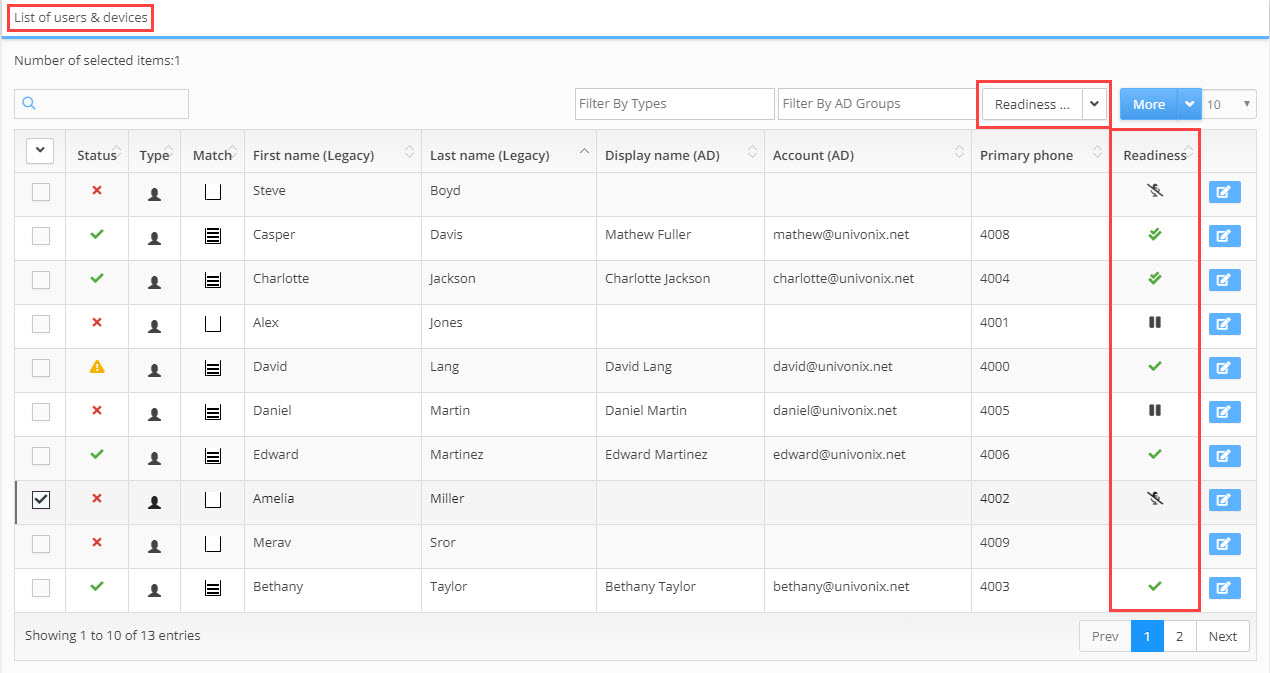
- Readiness: allows you to manage your work effectively by labeling user or device results according to their current 'work' states. Select the lines you want to update by marking the checkbox of each line. Choose the state from the Readiness drop down, automaticity all the selected lines will be updated.
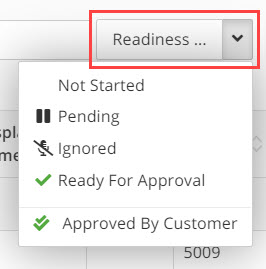
In the Readiness column in the results table an icon will appear. The icon will depend on what state you selected.
These states include:
- Not Started (No Icon) - work has not started on this line, this is the default state of every line
- Pending
 - work is in progress, additional information, clarification or authorisation is needed before completing the work and changing the state to Ready
 - Ignored
 - this line is to be ignored and will not be migrated
 - Ready for Approval
 - work on the line has been completed by the SI, the configuration is waiting approval from the customer before provisioning
 - Approved By Customer
 - the configuration has been approved by the customer and the line will be provisioned with the next batch
Note: Readiness is an 'internal' marking for filtering purposes and will not effect any other process in the system. To mark a line as Ready For Approval, you must first resolve ALL open issues on that line. To mark a line as Approved By Customer, the line must first be in the Ready For Approval state. |
Note: to provision a user or device's configuration, the new target PBX configuration data for that user or device must first be approved by the end customer. Once approval is granted the SI will update the user or device line from Ready For Approval to Approved By Customer. |
Working On Results
In the More drop down list there are additional 'Bulk' actions that can be taken on the lines in your results table.
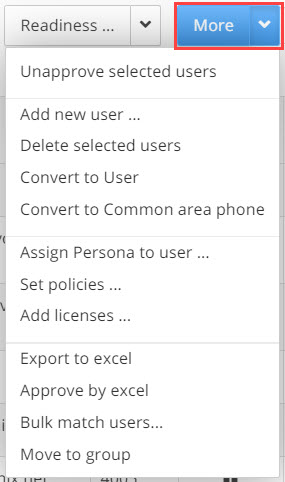
After selecting the lines you want to action, the following options from the More drop down menu are:
Unapprove Selected Users |
Click to unapprove users or devices that have been approved for provisioning. The lines will be unapproved and the tick will be removed from the Approved column.
|
Add New User |
Click to open the Add New User window. This feature is used when you are adding new users or devices to the project that where not part of the original import of source PBX configuration data. So if new users have been added to AD (or 'old' users are being given telephones), since the project started, this will enable you to add them to the project to set their telephony configuration as part of the batch migration process.
When adding a new user you there two options: By Active Directory - In the By Active Directory tab, a list of all the users in the AD will appear. (It is recommended to Refresh the AD before this step. For a detailed description of how to do this, click HERE) select the AD user you want to add to the group you're working on, click the Create button. The user will be added. By File - In the By File tab: a. click the Download Template button to download the Add New User Import File, this is an excel that provides the customer with a simple template to input the data of users that need to be added to the Planner. Once the template is ready, import back into Planner. b. click the Import File button to open a standard Microsoft file manager window to brows for and 'open' the Add New User Import File template. The users will be added automaticity. Once added, review the users status, resolve any open issues and mark them as ready for approval.
|
Delete Selected Users |
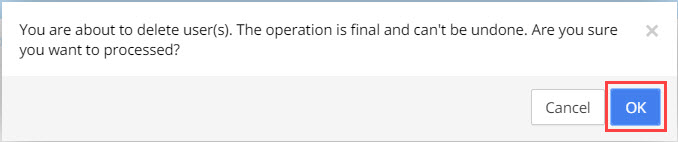
Click to delete selected users / devices. This will remove the user or device from the project and they will no longer appear in any user list and they can not be added back into the project. Even if you re-import the data from the source PBX that user will NOT be added back into the project. The use case/s can include removing a user that has left the company or removing devices that are no longer needed. After clicking on Delete Selected Users a warning message appears, click OK button to proceed with the action or Cancel to stop.
|
Convert to User |
Select a Common Area Phone, click to convert the CAP to a user. The only indignation that an action has taken place is that the icon in the Type field will update.Following this action you will need to enter the users Details window and map the user to the target PBX |
Convert to Common Area Phone |
Select a User, click to convert to a Common Area Phone. The only indignation that an action has taken place is that the icon in the Type field will update. Following this action you will need to enter the users Details window and map the device to the target PBX |
Assign Persona to User |
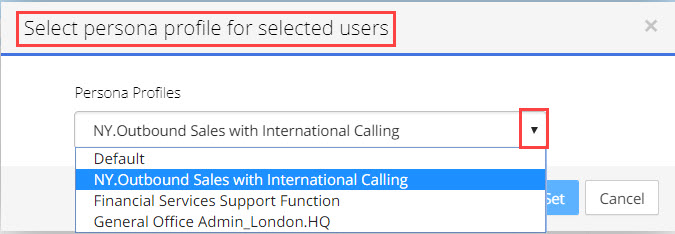
Click to add a Persona to the selected user/s. If the selected users already have a persona then the old persona will be removed and replaced with the new persona, each user can only have one Persona. After clicking Assign Persona to User, the Select Persona Profile for Selected Users pop-up appears. Click on the arrow to open the Persona Profiles drop down, select the persona to add and click the
|
Set Policies |
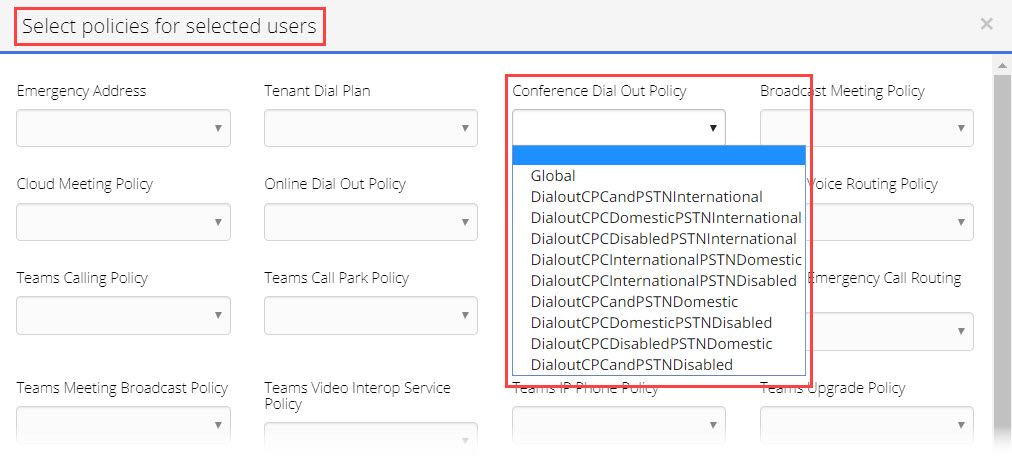
Click to add Policies to the selected user/s. If the user/s already have existing policies, this action will ADD additional polices to what they have. Each user can have multiple policies. The window will have different fields depending on the policies of the target PBX. After clicking Set Policies, the Select Policies for Selected Users pop-up appears. Using the drop down fields, select which policies to add, when finished click the
|
Add Licenses |
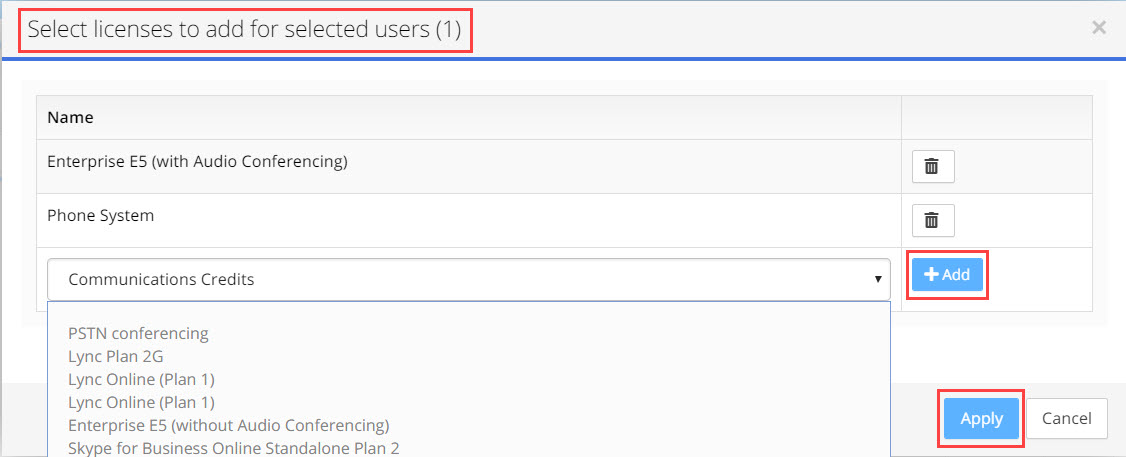
Click to add Licences to the selected user/s. If the user/s already have existing licences, this action will ADD additional licences to what they have. Each user can have multiple licences. After clicking Add Licences, the Select Licences to Add for Selected Users pop-up appears. Using the arrow, open the drop down and select a licences, click the
|
Export to Excel |
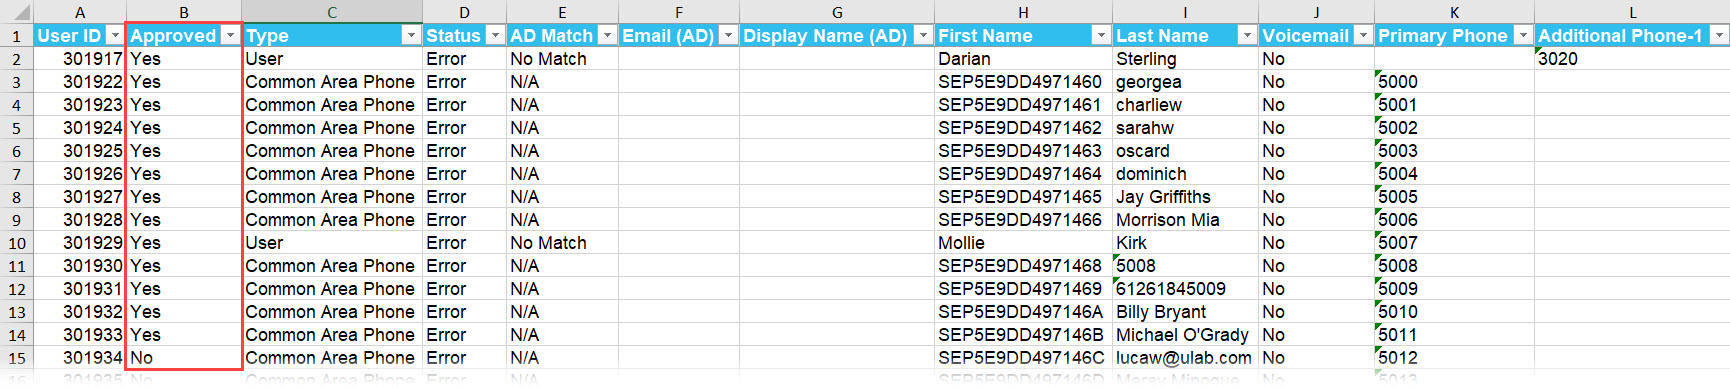
Once all open issues have been resolved and the group is ready for provisioning, generate this excel to send to the customer for there 'sign off' and approval to provision the data. Click to export the data for the results set to Excel. This will export all the results, irrespective of what lines you have selected. This process is 'one click', the excel file will download automaticity to your computer. In the excel there is an Approved column, the customer will update this column with Yes next to every line that is approved for provisioning. This file will be imported back into UnivonixPlanner and will update the batch with the approved users, this is the last stage before migration beginnings. Open the excel file:
|
Approve by Excel |
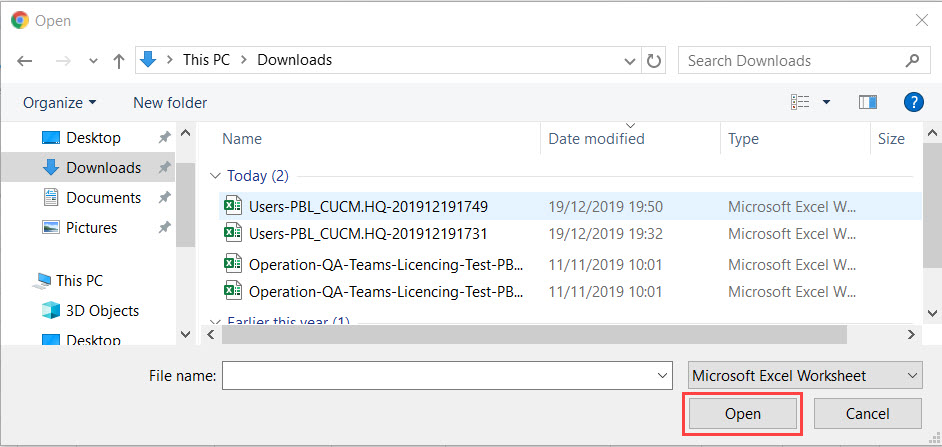
Once the excel has been reviewed and the user and device lines approved, the excel is imported back into the system. This import will automaticity update the batch with the approved users. Click to open a standard Microsoft Windows file browser, find and select the excel, click the Open button, the file will be imported into the Univonix system.
|
Bulk Match Users |
This action does not require you to select users. To bulk match users from Planner to Active Directory, click Bulk Match Users. The Bulk Match Users window opens.
Click Download Unmatched Users, the system will download all the unmatched users for the group you are work on. If you want to download all the unmatched users for the Batch, then you must be in Global View when you open the Bulk Match Users feature.
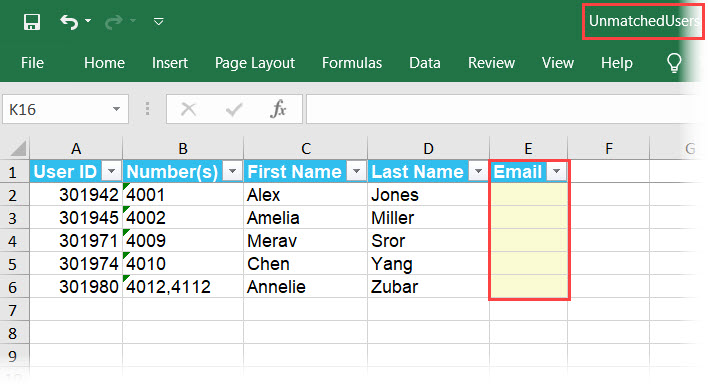
Example of Download Unmatched Users excel:
In the excel screen shot above you can see that the email column is empty, this column must be filled by the customer for matching to take place. Once filled and ready for import; Click the Upload Matched Users button, a standard Microsoft Windows file browser opens, find and select the excel, click the Open button, the file will be imported into the Univonix system. The users will be automaticity matched and assigned to their AD users. |
Move to Group |
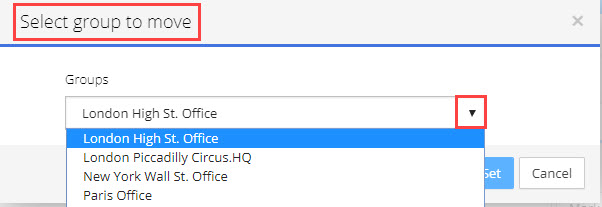
Click to move selected users or devices to a different group within the Batch. If users are currently in a group, this action will remove them from the group and put them in a new group. Users can only be members of one group. After clicking Move to Group, the Select Group to Move pop-up appears, use the arrow to open the Groups drop down list and select a group, click the
|