Resolve Open Issues
Resolving Open Issues
Step 1: Assign Persona Profiles
- In the List of User & Devices table, select users you need to add profiles to.
- Open the More drop down list and select, Assign Persona to User
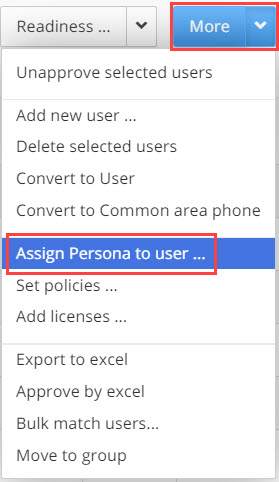
- The Select Persona Profile for Selected Users pop-up appears. Click on the arrow to open the Persona Profiles drop down
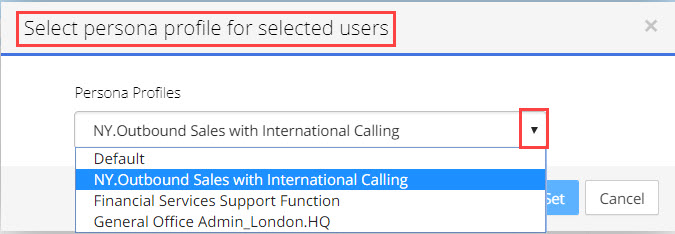
- Select a Profile from the list and click to add to the selected user/s. If the selected users already have a persona then the old persona will be removed and replaced with the new persona, each user can only have one Persona. It is recommended to do this in 'Bulk'.
- Click the
 button. The new persona will be added to the user/s.
Step 2: Filter Results for Open Issues
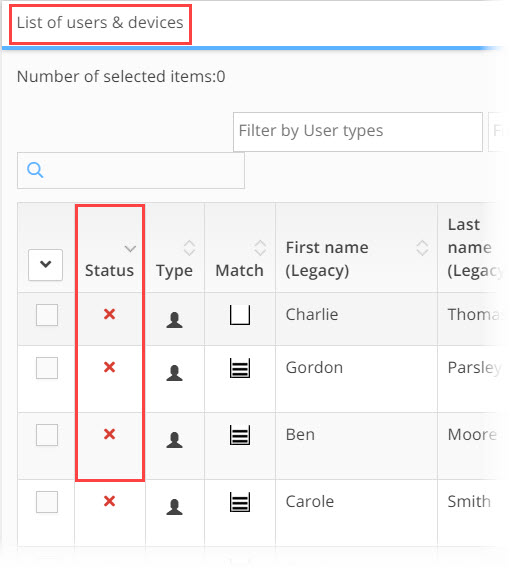
Filter for those results in the List of User & Devices table where the status of the line is ![]() indicating that there are open issues on this user or device that must be resolved before provisioning can take place.
indicating that there are open issues on this user or device that must be resolved before provisioning can take place.
The fastest way to filter for these results is to click on the Status column header, the table results will order themselves by status, you may need to click on the column header twice to get the results with the red X to align first.
To understand what the issue/s are that are causing the red X status, click on the  details icon for the corresponding line in the last column of the table.
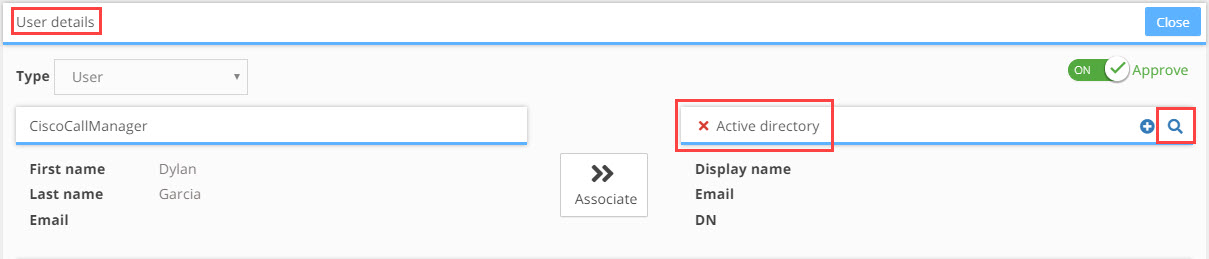
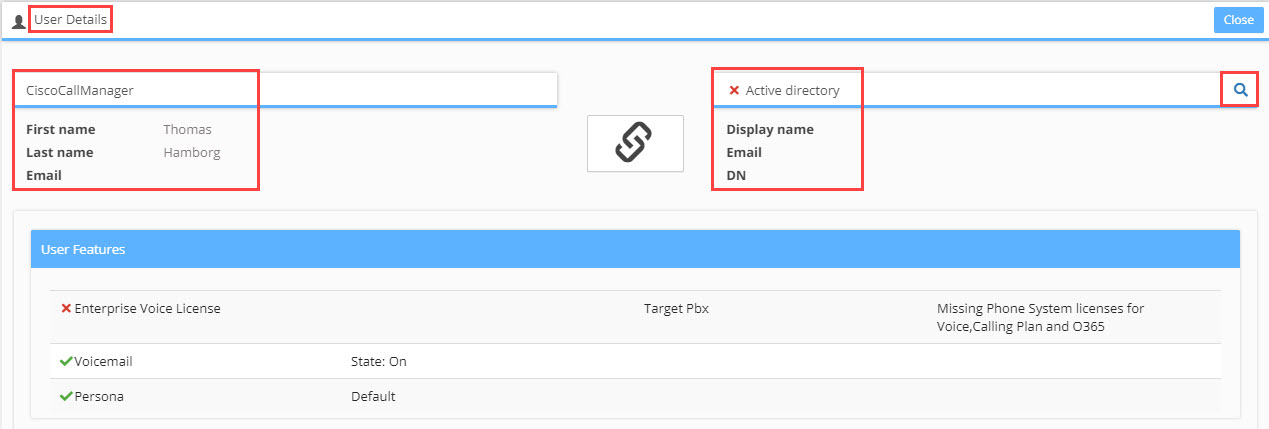
The User Details window opens. The window is divided into several sections:
Note The Feature Status Indicators:
|
Indicates this feature can be migrated to the Target PBX |
|
Indicates the Target PBX does not support this feature |
|
Indicates this feature is partly supported by the target PBX |

Step 3: User & Device Matching:
The 'matching' section of the window highlights issues the system is having, matching the user or device from the source PBX to the same user or device in the target PBX.
In the example below we can see a user from CiscoCallManger that has been successful matched to Microsoft O365 Active Directory.

If the match is incorrect or you need to change the match:
- Click the
 delete icon in the target PBX title bar.
 - To search for the correct match, click the
 search button in the target PBX title bar. The Match Active Directory User window opens.
 - The system will make recommendations for possible matches using Smart Match. Or you can manually search for a match by using the free-text search field.
- When you find the correct match, click the Save button.
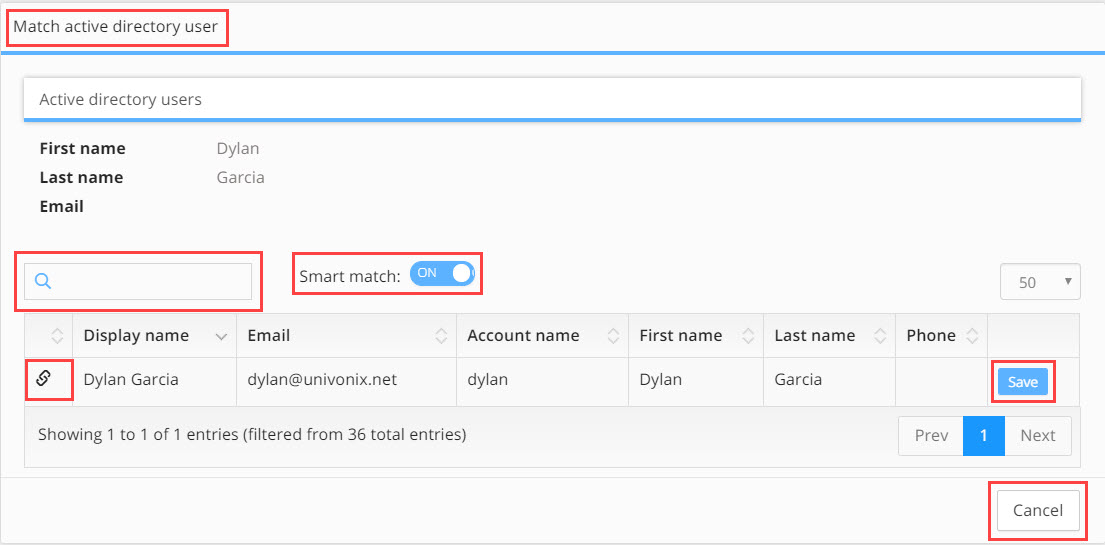
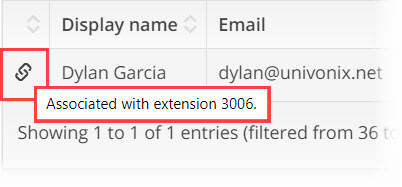
When searching for users or devices in the Match Active Directory User window, be aware that any result that has the ![]() link icon, is a line that has already been matched. When you click the Save button, this line will "dissociated" from its current user and be re-allocated to the new user you are working on. If you scroll over the icon a pop up note will tell you with what number / extension the user is already associated with.
link icon, is a line that has already been matched. When you click the Save button, this line will "dissociated" from its current user and be re-allocated to the new user you are working on. If you scroll over the icon a pop up note will tell you with what number / extension the user is already associated with.
If, from the start, the system has not found a match for the user are working on (see screen shot example below) then complete steps 2 to 4 as described above.
Note: If no match can be made because no user or device exists in the Target PBX, then the end customer will need to create these entities in the target PBX. Once this is done, you will need to refresh the data in Univonix Planner from the target PBX and complete the matching of users and devices. |
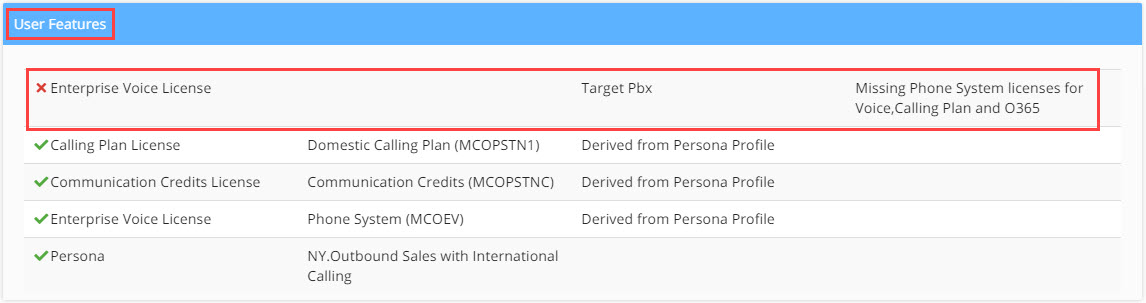
Step 4: User Features
This section lists those features; licences and policies that are connected directly to the user and not to a line or extension. Each record clearly shows its status indicating whether the 'configuration' for that feature can be migrated or not. When there is an issue, the system will also show a description of what the problem is. In the example below we see that the user is missing the phone system licences for O365, without which they can not be migrated to Teams.
To take action on the issues from this section you will need to;
a. Close the window and return to the List of Uses & Devices window
b. Select the user you are working on, by marking the relevant checkbox
c. Open the More drop down and select the needed action, such as Add Licenses
d. Once you have completed the action, return to the users User Details window to continue assessing open issues until all are closed
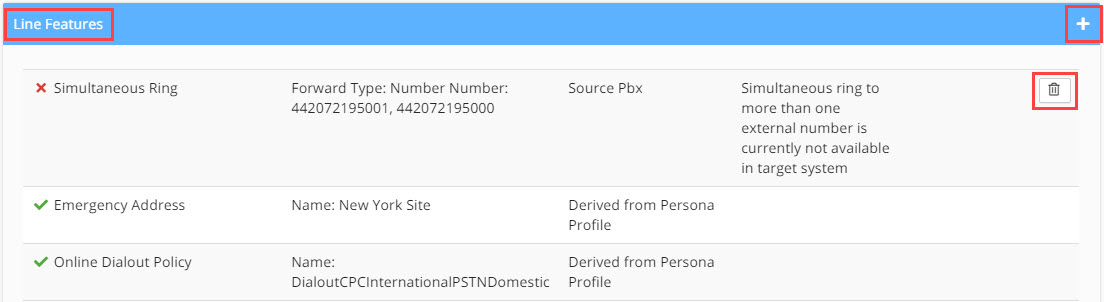
Step 5: Line Features
The Line Features window list all of the lines/extensions configured for that user from the source PBX. For each line, a list of line features and policies is defined.
Some of the features and policies can be removed, if this is possible then the  delete icon will be available at the end of that line feature record.
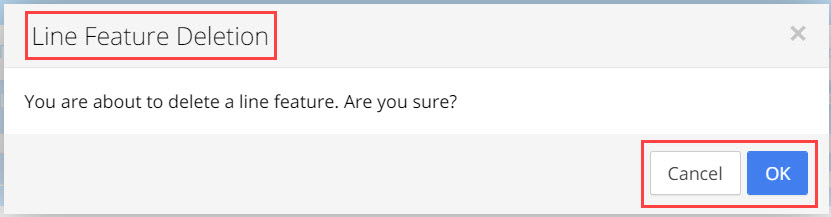
Click on the delete icon, the Line Feature Deletion warning message pops-up, click the OK button to continue or Cancel to quite the deletion.
To add additional features to the line:
- Click on the
 add icon.
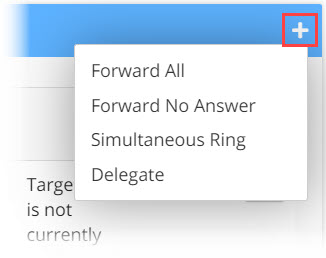
 - The add additional features drop-down opens, select the feature you want to add by clicking on it.
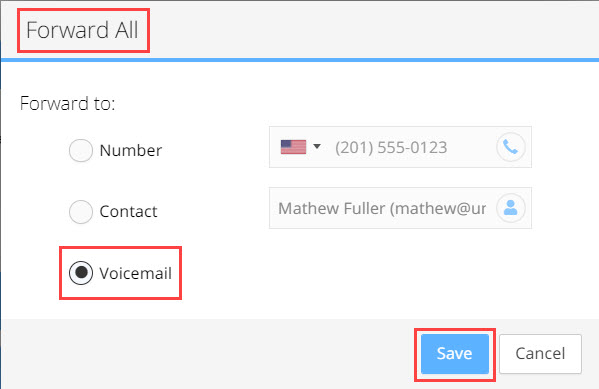
- A definitions pop-up window will open. Set the definitions for the feature and click Save.
- The feature will be added to the Line Features list.
Options Overview
Forward All: will automaticity forward all calls placed to this line, the line device will not ring
Forward No Answer: the line device will ring, if no answer within pre-defined number of seconds, the system will forward the call
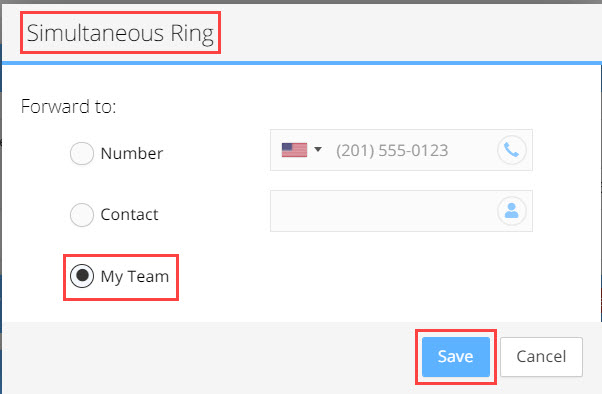
Simultaneous Ring: the incoming call will ring "at the same time" on multiple devices
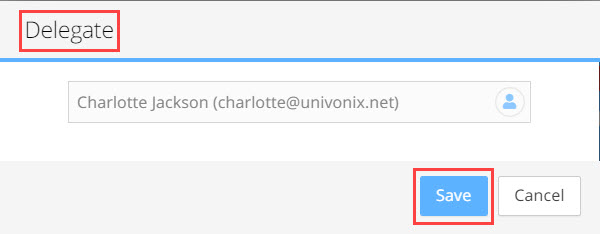
Delegate: call will ring on multiple devices, this is a Boss / Secretary scenario where the delegate can answer the call.
Example:
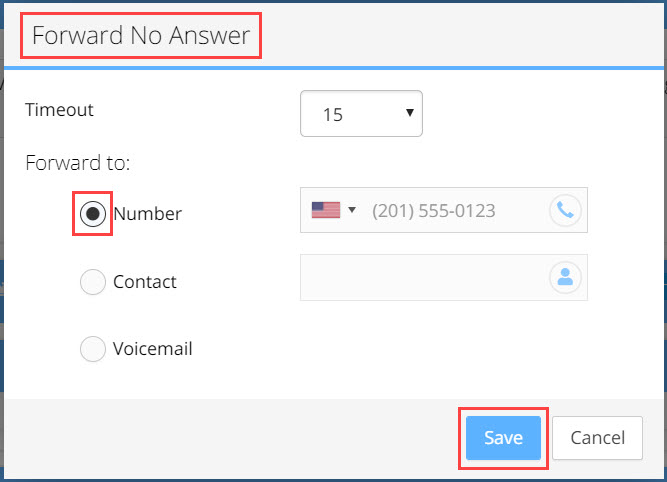
The screen shot below is an example of the definitions pop-up window for the Forward No Answer feature.
Timeout:
Define how many seconds the call will ring before being forwarded. Click the drop down arrow and select from 5 to 60 seconds
You have three Forward To options. Select the radio button for the option required.
Number: what phone number to forward the call to if there is no answer
In the number field select the country, 'country flag' for the international dialling code for number you are adding. Type in the remaining numbers.
Contact: which person to forward the call to if there is no answer
Click in the contact field, begin to type the name of a user to forward the calls to, the list of options will decrease the more you type.
Voicemail: forward to voicemail
Select the voicemail radio button, all missed calls will be forwarded to the users voice mail.
Line Feature Icons
The Line can be given additional attributes, this is managed from the icons in the Line title bar.

|
icon indicates that the line can be migrated without losing any functionality |
|
icon indicates that the line cannot be migrated |
|
icon indicates the line can be migrated, however some features that where active for this line in the legacy PBX will not be supported in the target PBX |
|
a user can have multiple lines, each line will be numbered and will have its own set of definitions to manage |
|
icon to indicate that this is a phone line |
|
icon to indicate that this line is the users Primary Line. If there are multiple lines, line number 1 is by default the primary line. To select a different line to be the primary line, go to that line and click on the crown icon in that line. That line will be moved to the Line 1 position making it the new primary line. |
|
the Line Number or Extension |
|
edit button to update the phone or extension number for this line, |
|
to save the update to the line number, click the save changes icon |
|
to cancel the update to the line number, click the cancel changes icon |
|
delete icon, will remove the line |
|
Un-delegate Line button, use to disassociate this line from the delegate |
|
Mark line as Private, only relevant when migrating to Skype for Business |


Users With Multiple Phone Lines
Currently, Teams and SfB do not support multiple lines per user. (SfB can support an additional private line)
Thus a user with multiple lines is considered an 'issue' and will be marked with a red X, indicating that this line can not be migrated to the target PBX. Users configured with multiple lines will require additional actions.
When a user has multiple lines, one of the lines will be defined randomly as the user’s Primary line and marked with the  icon. The primary line designation can be changed.
Options to deal with multiple lines.
- Delete the lines: The simplest way to overcome multiple phone lines is to leave only one line and delete the rest. This will resolve the issue and allow provisioning.
- Create a Private line: SfB allows each user to have one additional private line. To designate the line as a private line, click the Key icon. (this icon will only appear when migrating to SfB) This line has a limited set of telephony features, please refer to Microsoft Skype for Business documentation to learn about the limitations of a private line.
Step 6: Group Membership
This section of the user details, list the various groups that the user belongs to, e.g. Hunt Group, Active Directory groups etc.

Step 7: Speed Dials
This section of the screen contains the speed dials configured by the user on the legacy PBX. Currently Speed dial configuration can not be migrated to Teams, this is why, for example we see the yellow icon in the screen shot example below. Speed dials can be removed using the delete icon.

Step 8: Device List
This section contains a list of all the devices that were assigned to this user in the legacy PBX.

Dealing With Open Issues: Examples
Below, are two step by step example of how to use the Users & Devices tool.
Example 1: User from source PBX (Cisco CUCM) not found in Teams Active Directory target
- Look for users with open issues. In the users list, click on the status column to sort the list by user status, this will order users with issues, to the top of the list. This may require 2 clicks on Status.
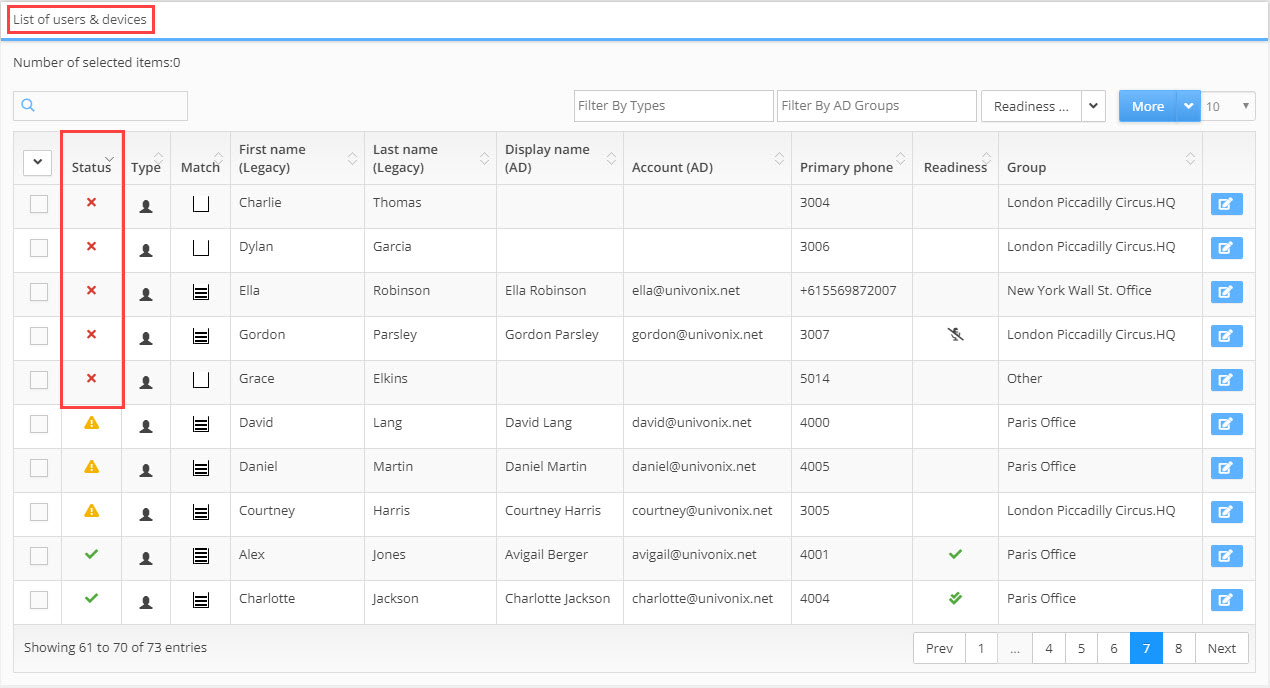
Rows with red 'x' status indicate that the user contains one or more issues that require operator intervention.
- Click the
 details icon to display the details for the user.
Fields marked with a ![]() red ‘x’ indicate that the data in this field can not be migrated, and a
red ‘x’ indicate that the data in this field can not be migrated, and a ![]() green tick indicates that the data is valid. In the screen shot example below the Active Directory field has a red ‘x’ and does not contain any values. This indicates the system was unsuccessful at finding, 'associating' the user Thomas Hamborg in the target Active Directory. To investigate this issues;
green tick indicates that the data is valid. In the screen shot example below the Active Directory field has a red ‘x’ and does not contain any values. This indicates the system was unsuccessful at finding, 'associating' the user Thomas Hamborg in the target Active Directory. To investigate this issues;
- Click on the search icon in the AD area box.
- The Match Active Directory User widow opens. Univonix Planner applies a 'fuzzy' search algorithm to help the operator in locating the correct user. Select one of the suggested names, or manually search the AD by typing text into the search box. The search results are updated automatically as you type. In this example, typing the first name thomas gives the following result:
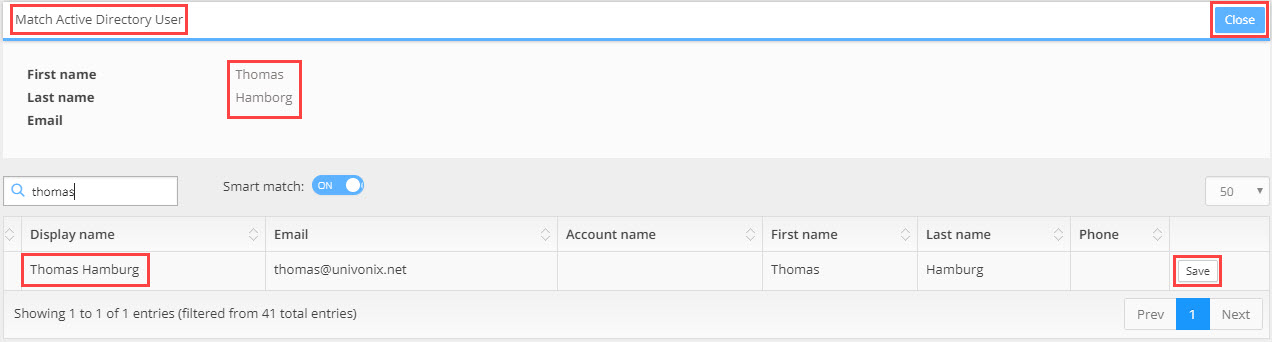
As you can see in the screen shot above, the second name of the user is spelled differently in the legacy PBX then it is in the AD.
- To associate the two entities, click the Save button in the AD result line of the user you want to map. Clicking Save tells the system that Thomas Hanburg from the AD is the same Thomas Hamborg as seen in the source PBX, and will associate them.
- Clicking Save will close the Match Active Directory User widow and open the User Details window, showing the updated data in the AD box.

- Click the Close button in the top right hand corner of the window to exit User Details and return to List of Users & Devices window. The record will look as follows.

If this was the only issue for that user, the Status icon changes to a green tick, indicating that all the issues for this entity have been resolved and the user is now ready and waiting for final customer approval before the provisioning process starts. If the Status icon is still a red X, this indicates that there are still open issues that need to be resolved.
The above steps need to be repeated for each of users with a red X.
Example 2: No Enterprise Voice License for Teams
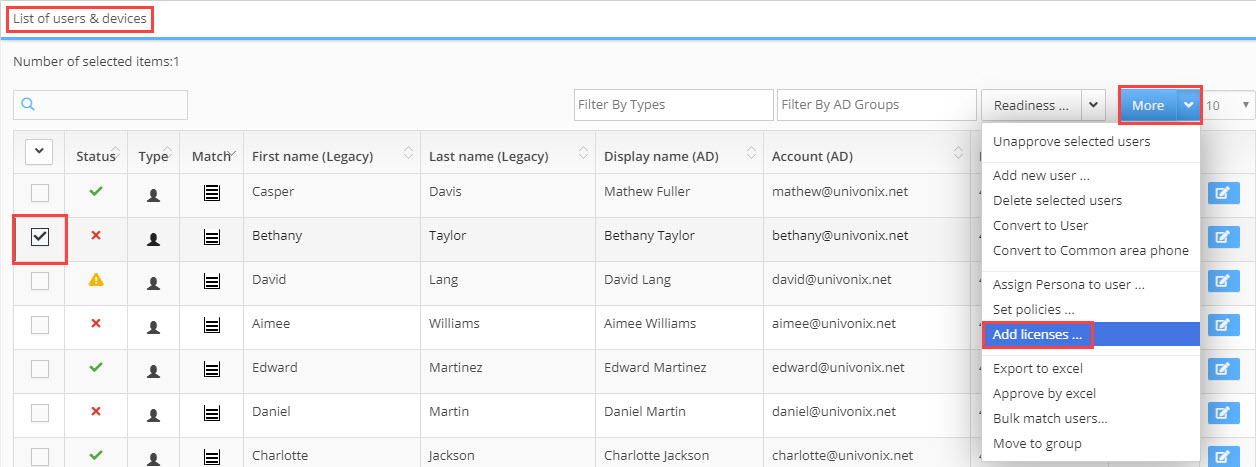
- Bethany Taylor has a red X in her Status column, click the Details icon to open the User Details window.

- Under User Features we can see that Bethany is missing an Enterprise Voice License, to add the license, close the User Details window.

- In List of Users & Devices window, select Bethany by marking the checkbox for her result line. Open the More drop down list and select Add Licenses.
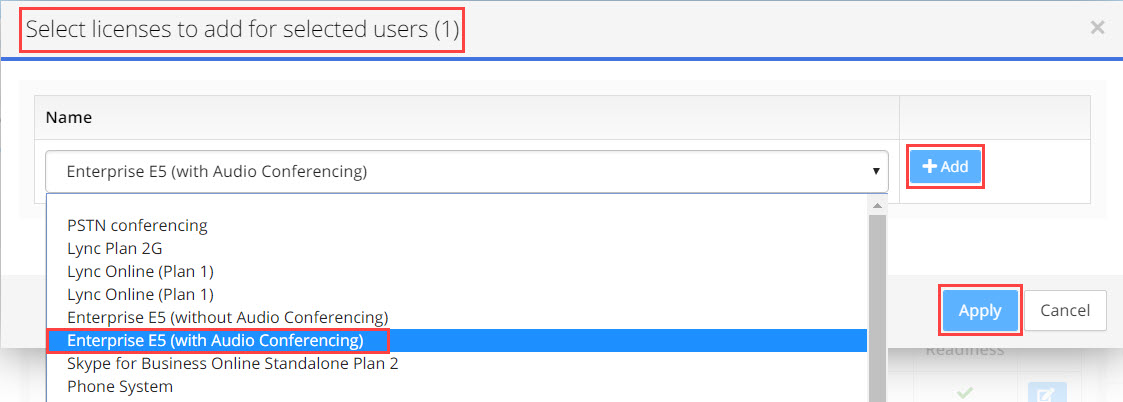
- The Select Licenses to Add for Selected Users pop-up window opens, click the drop down arrow and select the necessary voice licences, click the +Add button and then the Apply button. The pop-up will close.
- To check that the licence has been added, open the User Details window for Bethany, in the User Features section, check that the Enterprise Voice License feature is now a green tick. Note that manual added lines can be removed by using the delete icon at the end of the feature line.

- To Exit the User Details window click the Close button in the top right hand corner of the window.
Note: We recommend that you review all users that have the yellow hazard icon. The icon indicates that the system could not automatically translate this feature from the source PBX to the target PBX due to the inherent differences between them or due to missing functionality. It can also indicate that an item may cost more on the target PBX and thus may require the customers approval. The yellow hazard icon is informational and will not stop the provisioning process |
Note: When a feature is not currently supported by the target system, the configuration for this feature will not be migrated to the target and the user will not be able to get this functionality on the new system. Nevertheless, knowing that this user is going to be affected by the migration into the new system should initiate a conversation with the customer to prepare them before provisioning take place. Speaking with the customer / end users and understanding their business needs can often result in finding an alternative solution and increase customer satisfaction. |