Resolve Line Conflicts
Resolving Line Conflicts
In many legacy PBXs, a single physical device, such as an IP Phone, can be configured with multiple lines or extensions and can also be associated with more than one user.
For example, Alice and Bob share a small room with only one phone on the desk. Alice uses extension 2001 while Bob uses extension 2002. Both extensions are configured for the same phone. When an incoming call arrives, the phone rings per the destination extension, in this way Alice and Bob know who needs to pick up the phone.
Another example would be that Bob is Alice’s secretary. Whenever someone calls Alice, the incoming call also rings on Bob’s phone so he can answer the call when Alice is busy.
In the above examples, the configuration of the legacy PBX does not always include an explicit connection between the phone number or extension and the user. From a configuration perspective, there is a single device configured with two, or more, extensions, that is associated with two, or more users.
In cases like this Univonix Planner is unable to automatically rule which user owns which number and what is the use case, i.e. is it a boss-secretary situation or a device sharing situation, and therefore labels this set-up as a Line Conflict.
Follow these steps to resolve conflicts in the selected group:
- From the left hand menu column, click Line Conflicts, when in Group Details dashboard or in the List of Users & Devices window.
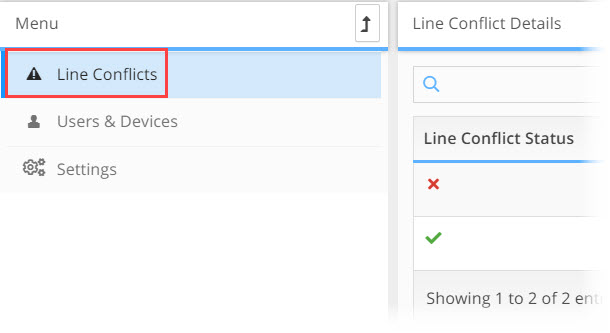
- The system displays the conflicts for the group.
- Status Column shows the current Line Conflict status for the line.
 icon indicated that there was a conflict that has been resolved, ether automaticity by the system or manually by a system user
 icon indicates that there is a conflict on this line that needs to be resolved
- Directory Number shows the phone number for the line.
- Resolve button opens the conflict resolve window
- Re-Do button opens the re-do resolve window
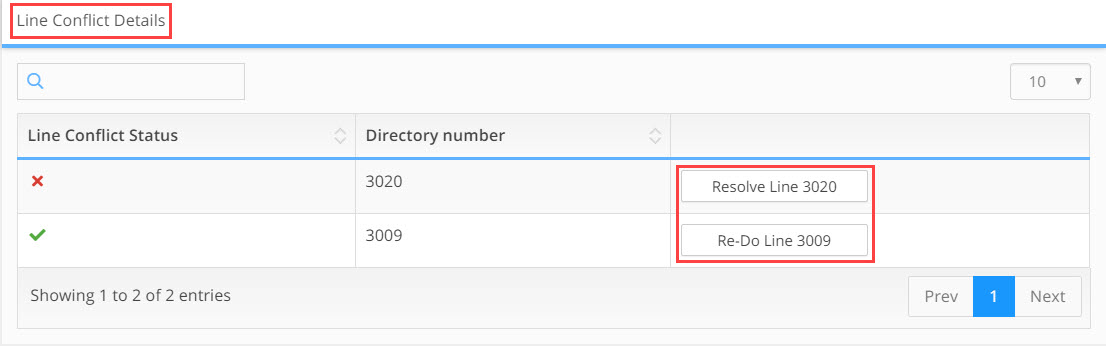
- Choose the line conflict you want to resolve and click the Resolve button or the Re-Do button, the Resolve Line Conflict window opens.
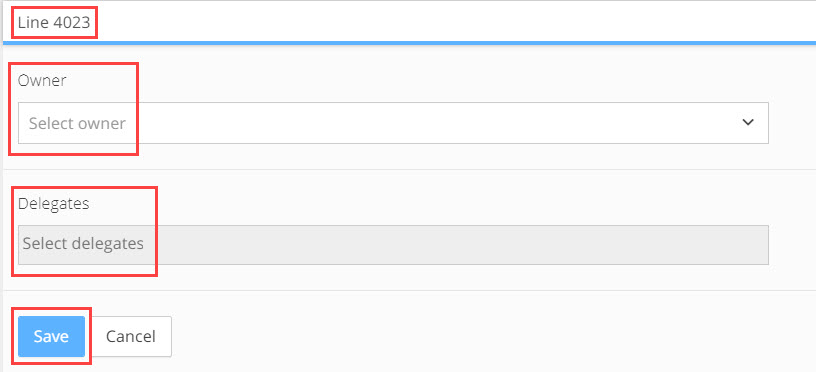
- In the Owner drop down field select the owner of the line.

- In the Delegates drop down, select the delegate for this line if relevant. It is possible to add multiple delegates to a single line.

- Click the Save button to apply the changes.
- The Line Conflicts widow opens, showing that the conflict was resolved.
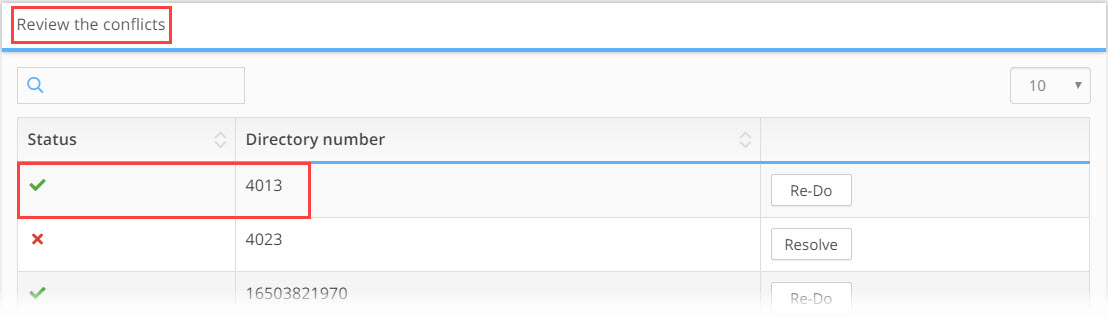
- Repeat this process for all the lines that need resolution. If you need to change a line that was already resolved, click the Re-Do button for that line.