Add A New Source PBX
Add New Source PBX
There are two flows to initiate the addition of a new source PBX to a project.
Flow 1
When creating a new project and no source PBX has yet been added, the Add New Source PBX Wizard will initiate automaticity when you click Finish in the last step of the the New Migration Project Wizard. Also, when you click the Open button of a migration project in the Migration Projects window that does not yet have a source PBX.
Flow 2
When source PBX's have already been added to the project, open the project by clicking the Open button in the Migration Project window for the migration project you are working on. The Source PBX window opens, click Add A New Source PBX button.
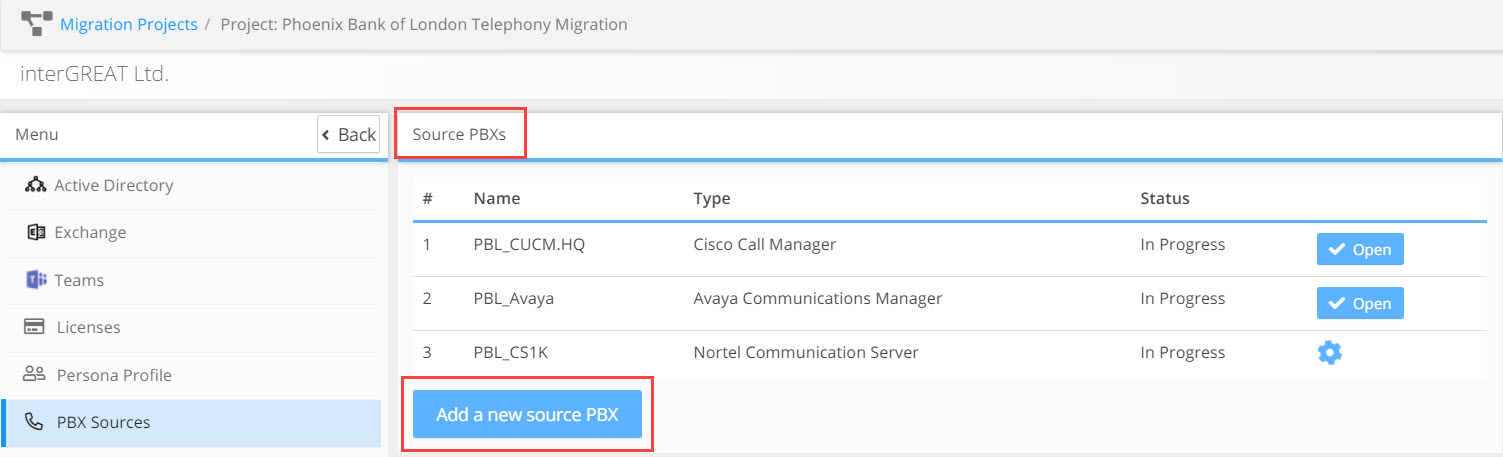
The New Source PBX Wizard opens. There is no limit to the number of source PBX's that can be added to a project.
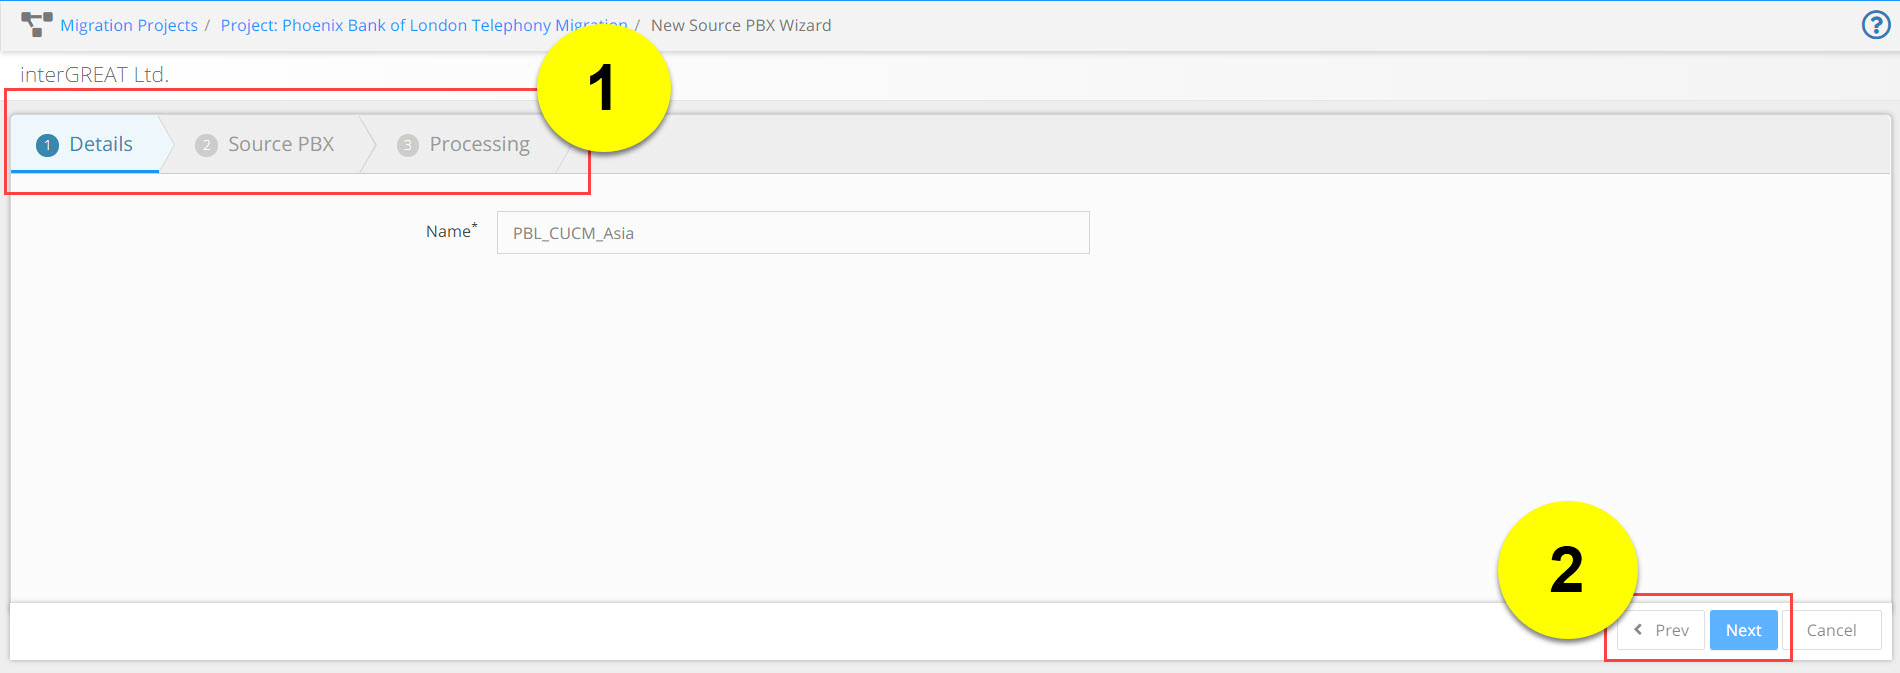
Complete the 3 steps in the New Source PBX Wizard. (highlight 1) All field names with a 'star' *, for example; Name*, are required fields, you will not be able to move to the next step in the wizard workflow until all the required fields in that step are completed. To move from one step to the next, use Previous and Next buttons. (highlight 2) Or click on the title of any one of the 3 steps.
New Source PBX Wizard Workflow
Step 1 - Details
Name: Type in the name of the source PBX in the Name field. We recommend to use the type of PBX in the name, e.g. CUCM, Avaya etc. and another name to help distinguish the specific PBX. We do not recommend using the physical location of the PBX in the name, as this can be misleading and confusing, especially if the PBX supports multiple locations.
Click Next.
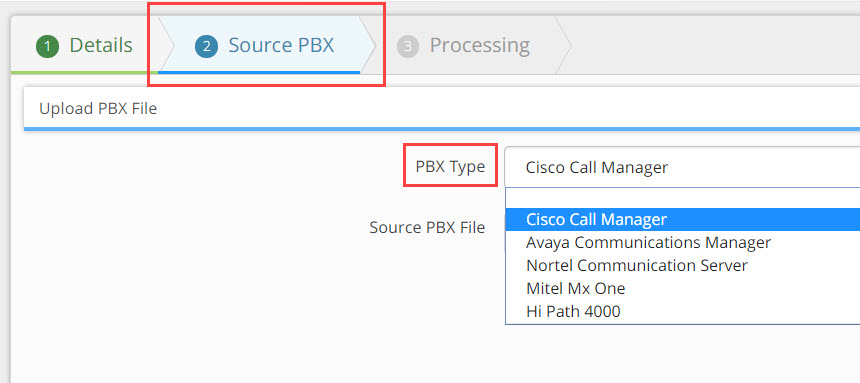
Step 2 - Source PBX
PBX Type: From the PBX Type drop down field select the source PBX type.
Source PBX File: In the Source PBX File field click the Choose File button, add the data file and upload to the Univonix system.
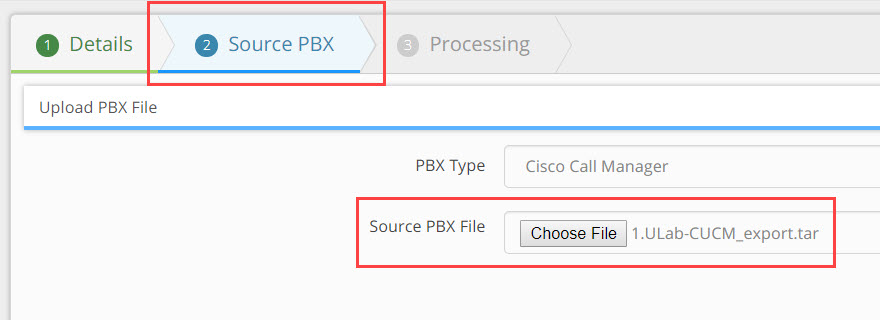
Note: The data file must be exported from the source PBX before starting this process, getting access to the source PBX may take time so start this process early. Instructions on how to export the necessary data from the source PBX can be found HERE |
Click Next.
Step 3 - Processing
The file has now been sent to the Univonix system for processing. The analysis and processing of the data may take up to 48 hours to complete, the owner of the project will receive an email as soon as processing is finished. You can exit the wizard and continue to work on the system, on other projects and or source PBX's without any restrictions.
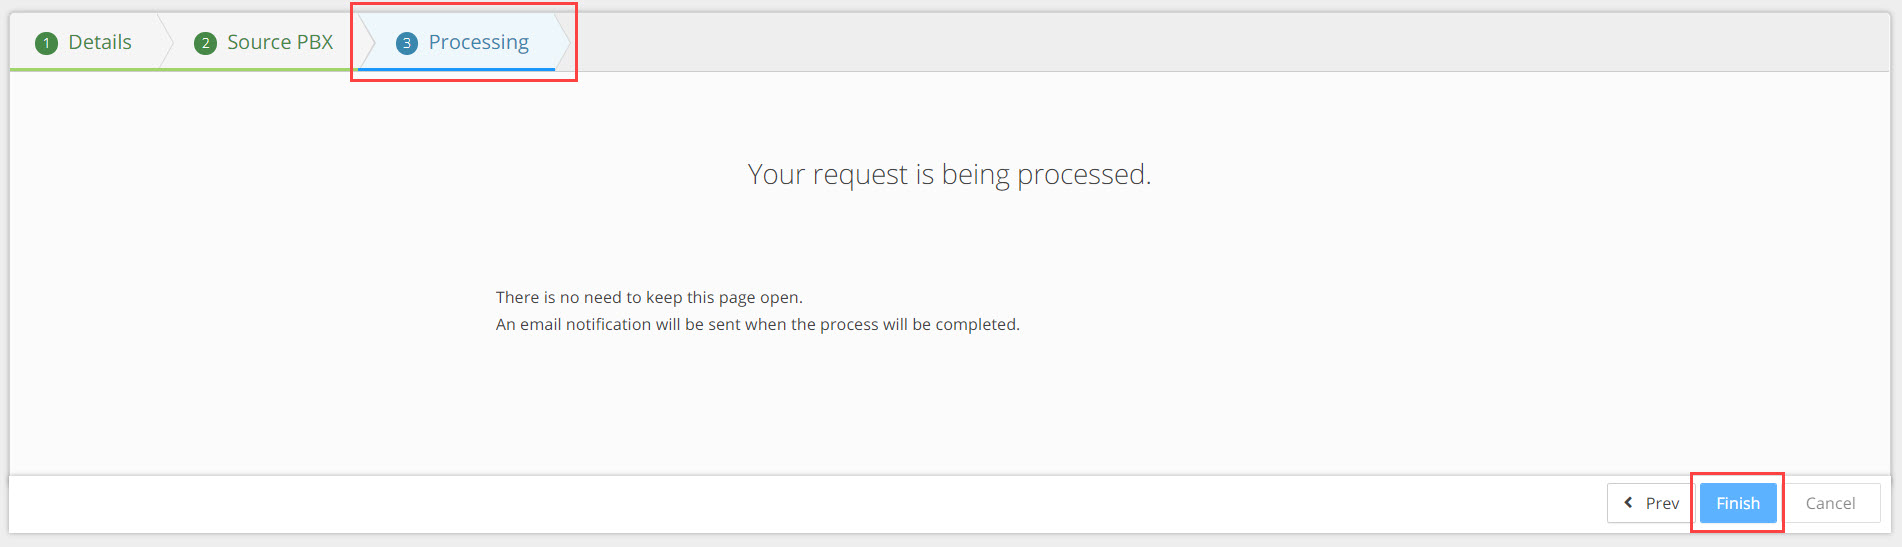
Click Finish to exit the wizard. You are returned to the Source PBX window.