Create A New Planning Project
Create a Planning Project
After logging into the system, the Migration Projects window opens.
If this is the first time you are creating a migration project, the migration projects area of the window will be empty!
The screen shot below shows a system where 3 migration planning projects have already been started.
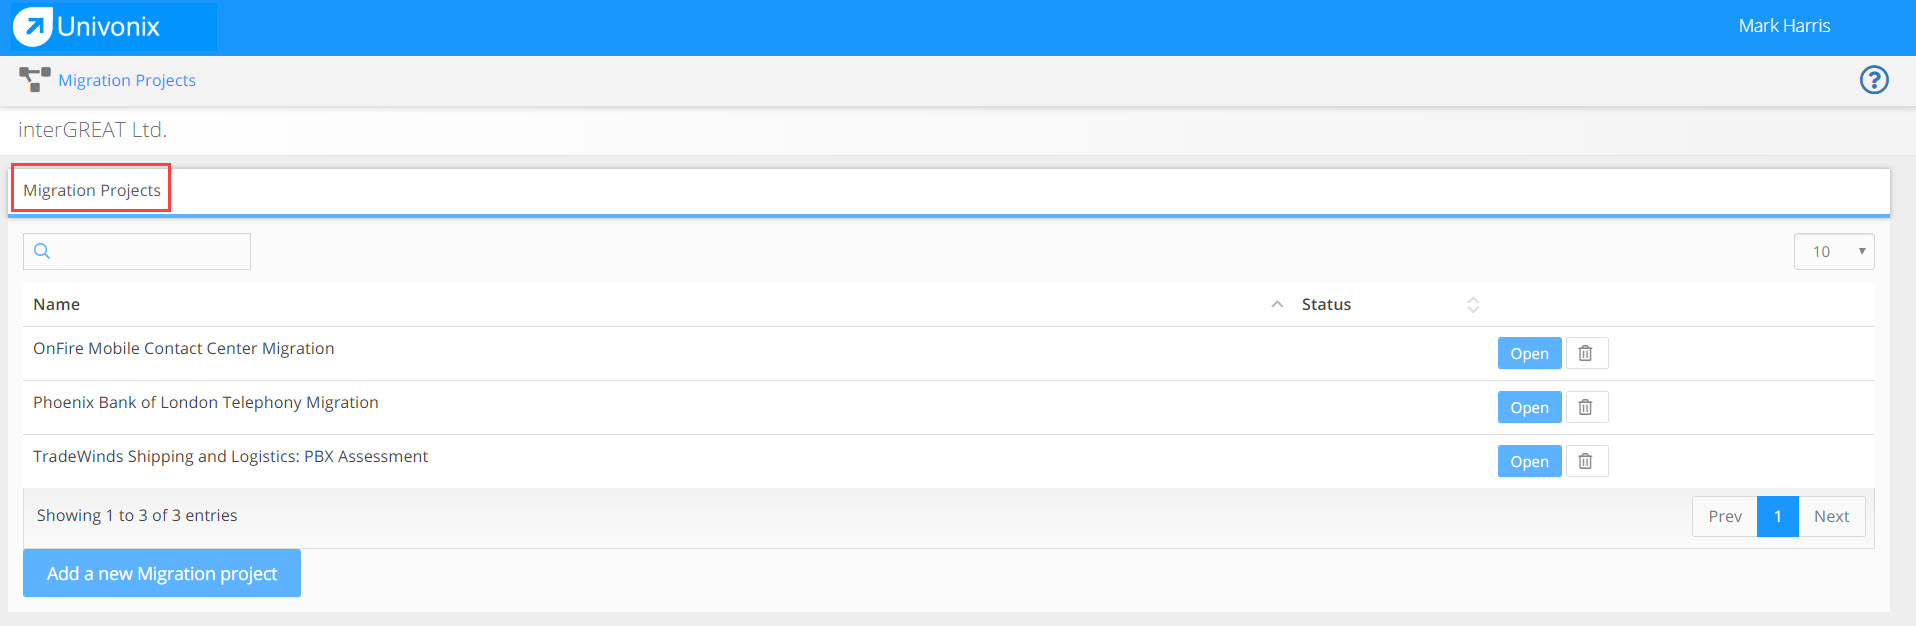
Typically you will create one migration project per customer, a single project can manage the planning for multiple source PBX's
Create a New Project:
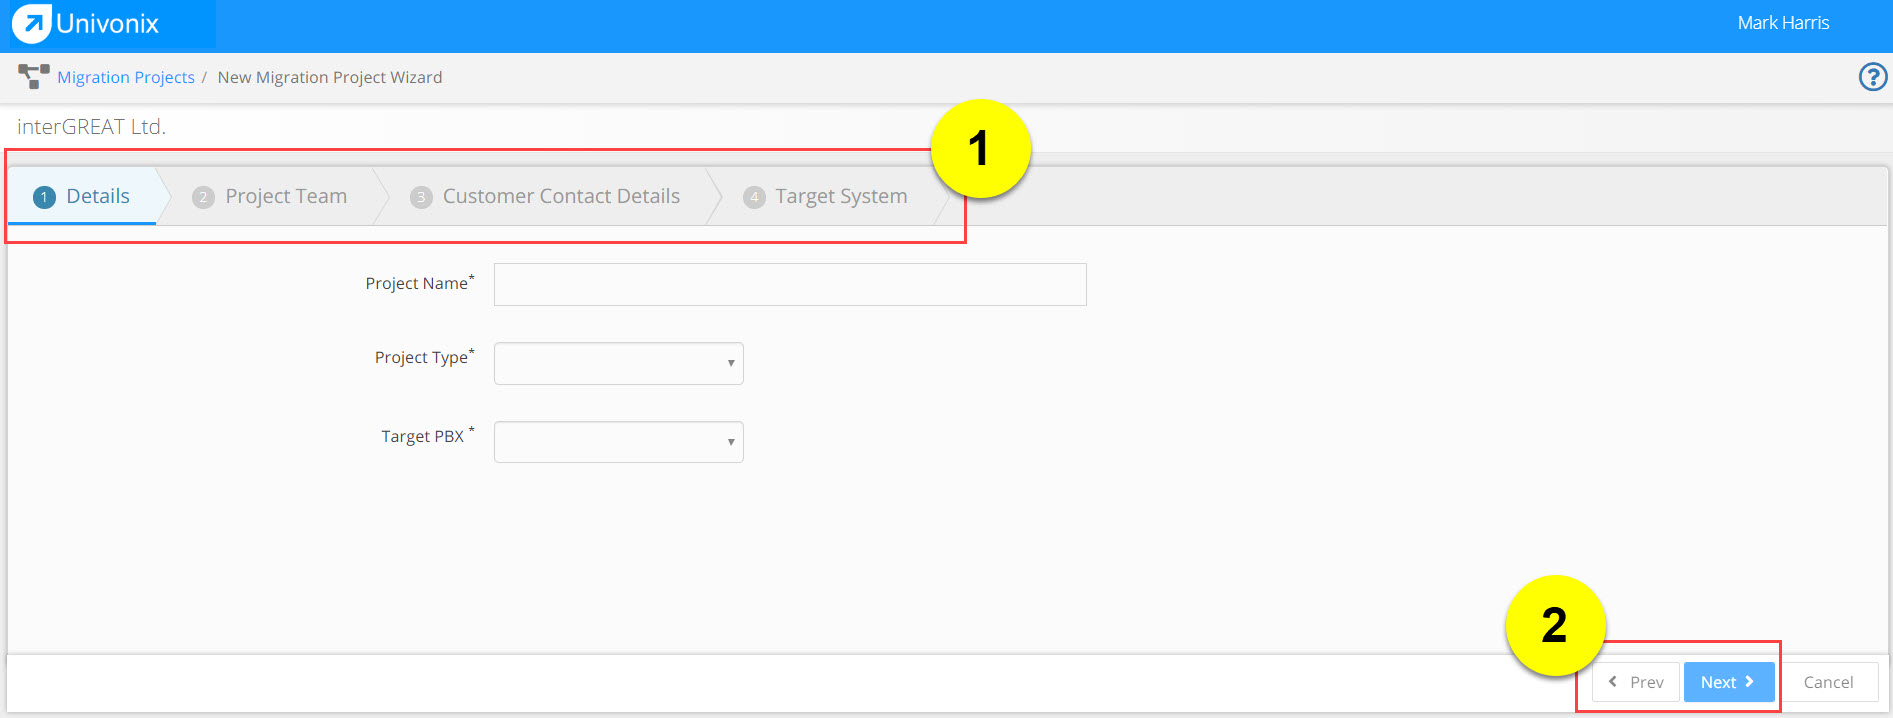
1. Click Add a new Migration project button at the bottom right of the window.

2. The New Migration Project Wizard opens
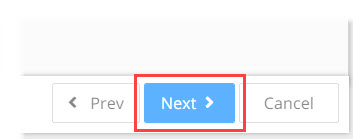
3. Complete the 4 steps in the New Migration Project Wizard. (highlight 1) All field names with a 'star' *, for example; Target PBX*, are required fields, you will not be able to move to the next step in the wizard workflow until all the required fields in that step are completed. To move from one step to the next, use Previous and Next buttons. (highlight 2) Or click on the title of any one of the 4 steps.
New Migration Project Wizard Workflow
Step 1 - Details
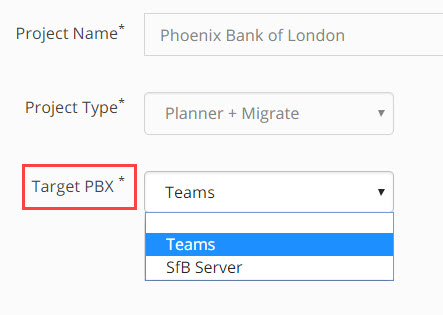
Project Name: Type in the name of the project in the Project Name field. We recommend to use the full name of the Company you are doing the project for, in this field. For example, Phoenix Bank of London Telephony Migration.
Project Type: Select the project type from the Project Type drop down list. If you select Planner you will have access to all the features and functionality of the Univonix migration planning tools, but you will not be able to publish or provision your plan onto the target PBX. If you select Planner + Migrate, you will have access to all the features and functionality of the Univonix migration planning tools as well as the ability to run a full data validation and provision your plan onto the target PBX.
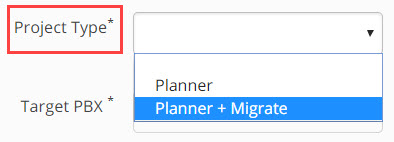
Note: When selecting a project type, this will have a direct effect on how much your company will be billed for using this product! |
Target PBX: from the Target PBX drop down list, select the PBX type that you are planning to migrate to.
Click Next
Step 2 - Project Team
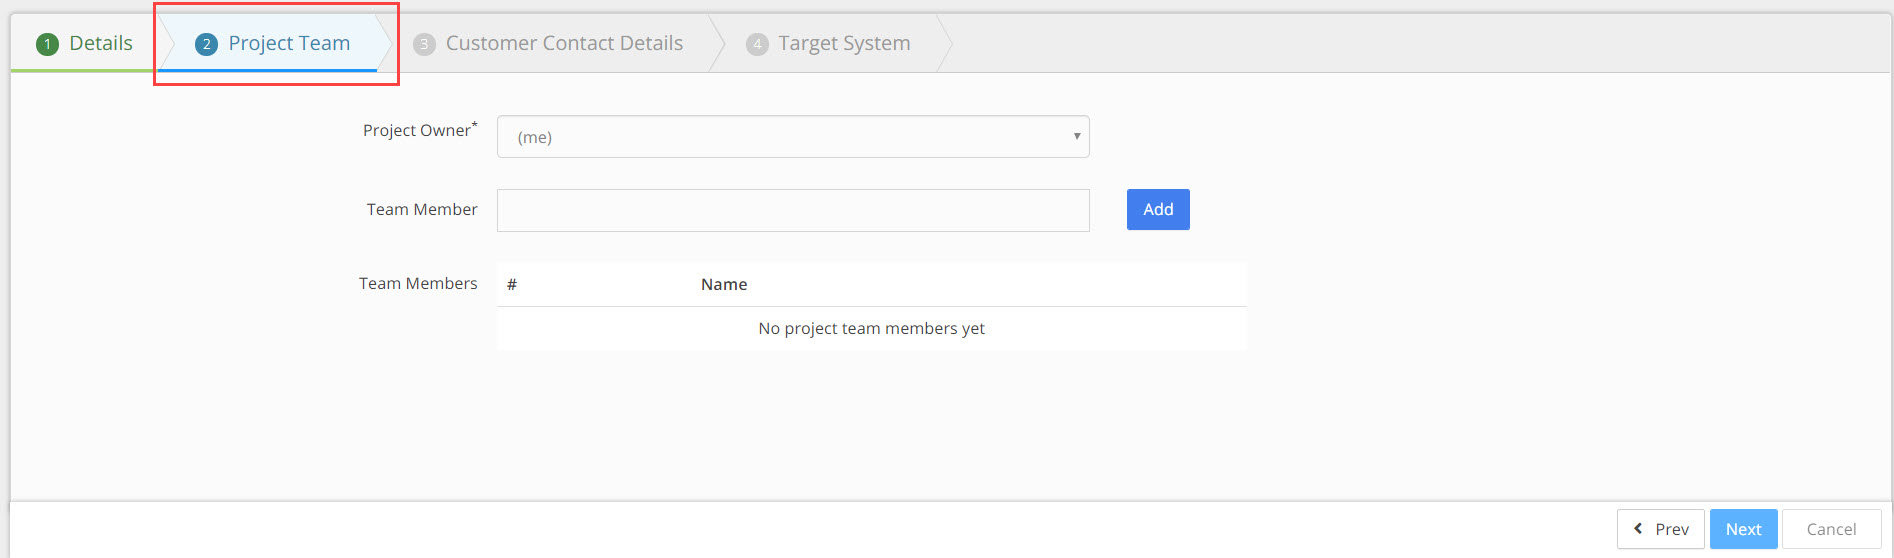
Project Owner: From the drop down list select the project owner, if no owner is selected then the user that opened the project will be selected by default.
Team Member: To add a user that will be part of this project, start to type the name of the user in the Team Member field, a list of possible users will automaticity appear, select the user you want, click the Add button. The users full name will appear in the Team Members area of the screen.
- There is no limit to the number of users that can be added to a specific project.
- There is no limit to the number of projects a signal user can be added to.
- All users are created in the system by the Univonix support team, if you need to add / remove or update users, contact Univonix support.
Click Next.
Step 3 - Customer Contact Details
In this step you will add the details of the person that is the key point of contact for this project at the customer.

Customer Contact Name: Enter the full name of the customer contact.
Email: Enter the email address for the customer contact.
Phone / Mobile: Enter the land line and the mobile phone number for the customer contact.
Comment: Add a comment describing this persons role and relevance to the project.
Click Next.
Step 4 - Target System
Add the system credentials needed to access the target PBX for this project. In the example screenshot below the target system is Microsoft Teams. This window and the credentials needed will change relative to the target PBX system you selected in Step 1 of the wizard.
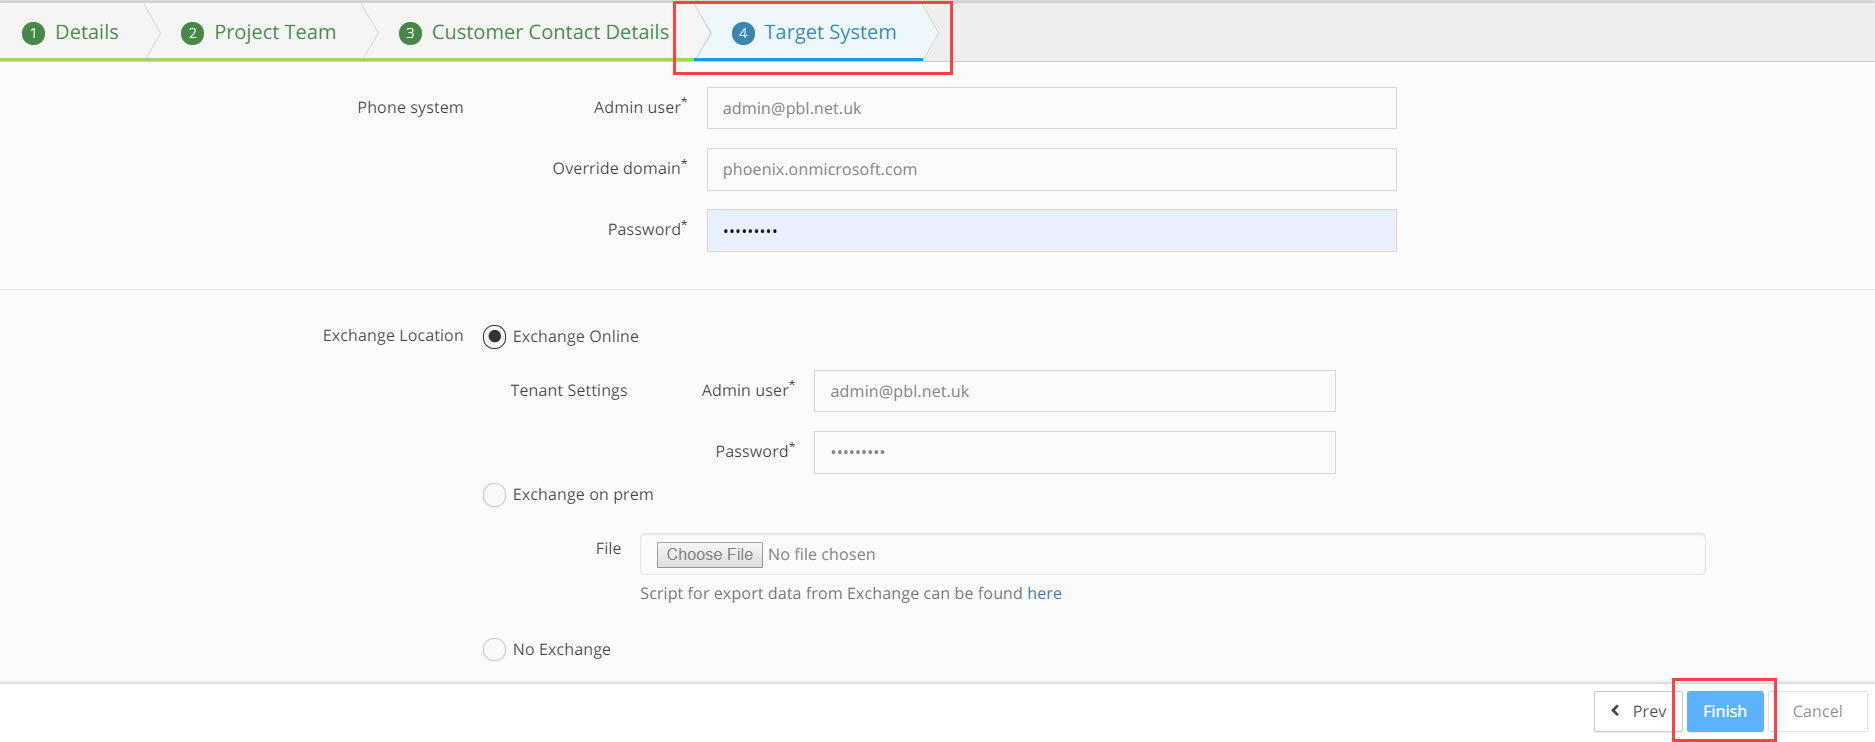
Add information to:
Phone System: (add credentials)
- Admin user
- Override domain
- Password
Exchange Location: (add credentials)
- Exchange Online
- Tenant Settings
- Admin user
- Password
- Exchange on prem
- Choose File
- No Exchange
Click Finish, the New Migration Project Wizard closes and the add New Source PBX Wizard opens.