Side by Side Settings
Side By Side Configuration
Only Relevant for Univonix Migrate
In a side by side scenario the customer needs the users that are still hosted on the legacy PBX and those that have already been migrated to the new PBX, to be able to place calls to each other, the legacy PBX and the new system must co-exist. This situation may occur in large projects where migration is done is stages over several mouths.
Example; Alice still uses her old Cisco phone connected to CUCM but Bob got a brand new Teams phone. Let’s analyze two possible scenarios:
- Bob calls Alice’s number – In this case the Teams server knows that Alice is not connected to it and forwards the call to the legacy CUCM. This of course must be configured as part of the dial plan.
- Alice calls Bob’s number – Assuming no new configuration was applied to the CUCM system, when the call is received by the CUCM, it will detect that Bob’s extension is no longer connected and Alice will hear a ‘fast-busy’ tone.
Clearly, the second scenario is unacceptable, users need to be able to place calls to their colleagues regardless of the system their on. Moreover, during the migration period, people are being moved from legacy to target PBX on a ongoing basis, therefore, a robust and easy to implement solution is needed.
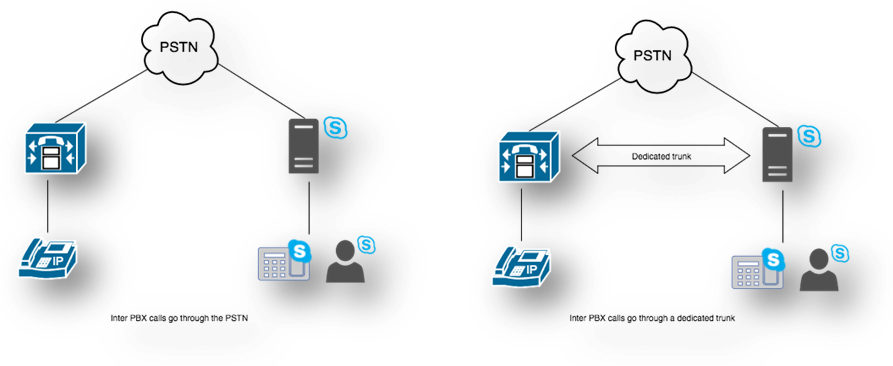
Side By Side Topology; there are several ways to build the side by side environment and connect between the legacy PBX and the new PBX servers, the most common are:
- Implement a dedicated trunk between the two PBX's. Generally this is the most cost effective & efficient way to connect users still on source system with those on the new PBX.
- Change the call routing to go through the PSTN. In other words, 'normal' dial-out via the public telephone network. This method will always work, but may be more expensive and/or occupy the external lines if used a lot.
Univonix Planner will enable the operator to easily configure the side-by-side environment. Each time a batch of users is migrated from the legacy PBX to the new PBX you will use Univonix Planner to generate a configuration file that you will import into the legacy PBX system. This configuration file will update the legacy PBX with the details of the migrated users and their call forwarding definitions.
Side By Side Setup
Side by side can be setup at two different levels within the migration plan.
Level 1. Global side by side configuration is done at the Source PBX level and will take effect on all Batches, Groups and Users from that source.
Level 2. Group side by side configuration that is done at the Group level and will effect only that specific group and its users.
It is possible to set Side by Side configuration simultaneously at both the Source and Group level, in this scenario the Group level configuration has priority over the Source configuration settings.
To set the Side by Side configuration file:
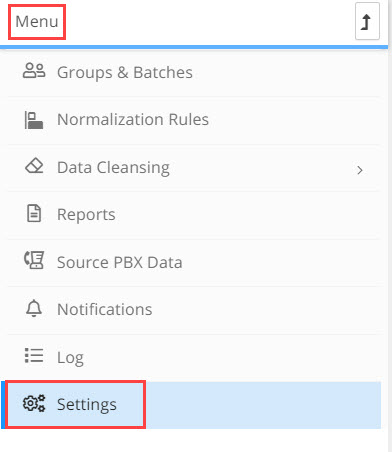
- a. For Global side by side settings, select the migration project, then the relevant source PBX. With the source PBX open click on Settings in the left hand menu column.
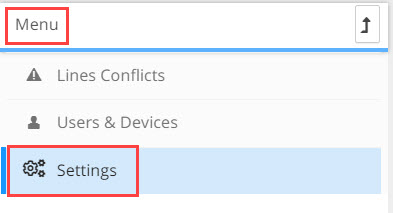
- b. For Group side by side settings, select the migration project, then the source PBX, then the batch, then the relevant group. With the group open click on Settings in the left hand menu column
- The Side By Side Dialing Topology window opens
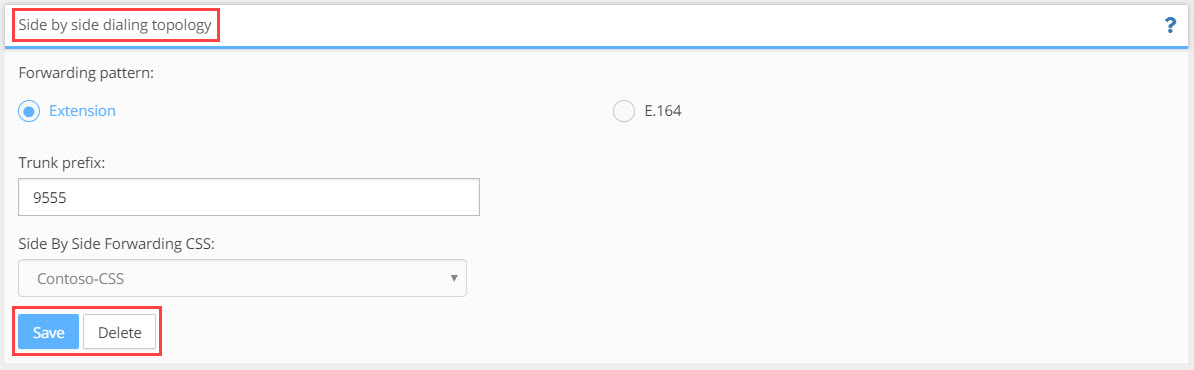
Forwarding Pattern: The topology that will be used to connect between the legacy and new PBX.
The configuration will set the Forward All feature for the users that were migrated. The forwarding number can be in one of the following formats:
Extension radio button: select if you are using a Trunk connection
Trunk Prefix field - the trunk prefix is the number that will need to be dialed (added to the extension) to reach the trunk connecting the two systems
Side By Side Forwarding CSS field - relevant only if the legacy PBX is Cisco CUCM, in the drop-down field select the relevant CSS
E.164 radio button: select if you are connecting through the PSTN
- Click the Save button to save the settings or Delete to remove the settings.
- To generate the Side by Side configuration file go to Menu at the Batch level and click Publish.
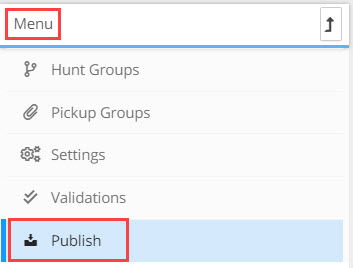
- The Publish window opens, click Generate Side by Side button. When the file is ready a line will appear under Type, to export the file, click the Download button.

- Import the Side by Side configuration file into the legacy PBX.
For Avaya use the Univonix Avaya PBX Connector tool to upload the Side by Side configuration file. This is the same tool that was used to export the PBX configuration file from the Avaya PBX at the beginning of the project.
- The tool is installed on the Avaya PBX desktop, open the tool

- Click the Configure SBS (side by side) button, a standard Microsoft file browser window opens. Find the Side by Side Configuration file you downloaded and imported into the Avaya PBX.
- Select the file, it will be automaticly installed into the Avaya PBX, this process may take some time depending on how many users are being updated. You will be able to track the progress of the install in the Avaya PBX Connector tool log window.
For CUCM you will import and install the Side by Side configuration file through the CUCM wed interface.
- Log into CUCM

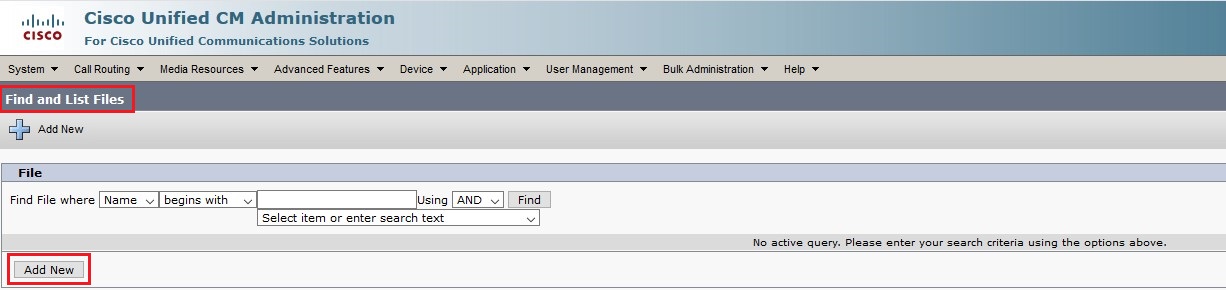
- Under Bulk Administration, select Upload/Download Files
- The Find and List Files window opens, click Add New button
- The File Upload Configuration window opens
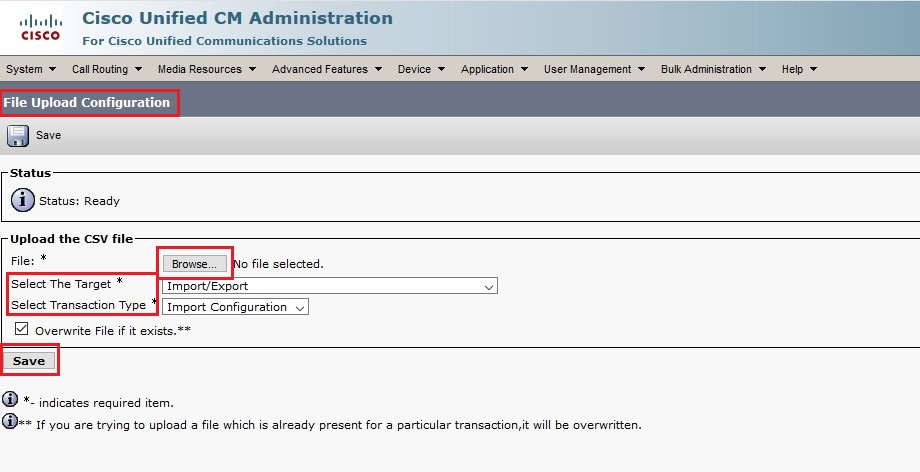
- Click Browse button, a standard Microsoft file browser opens, select the Side by Side Configuration file you downloaded from Univonix
- In the Select The Target dropdown list, select the Import/Export option
- In the Select Transaction Type dropdown list, select the Import Configuration option
- Click the Save button
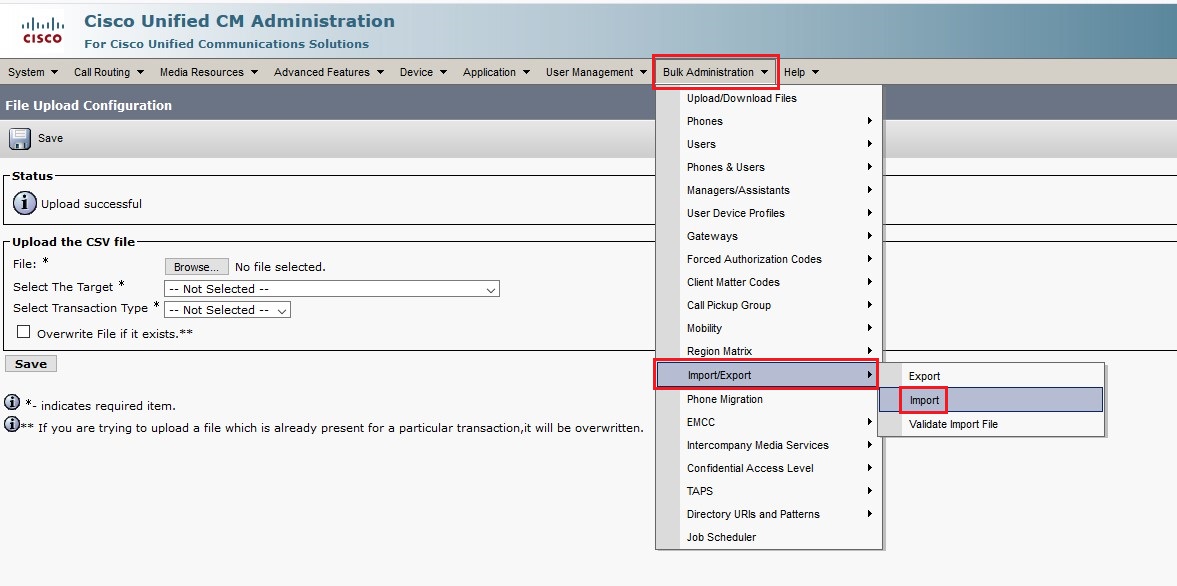
- Open Bulk Administration dropdown and select Import/Export and then the Import option
- The Import Configuration window opens
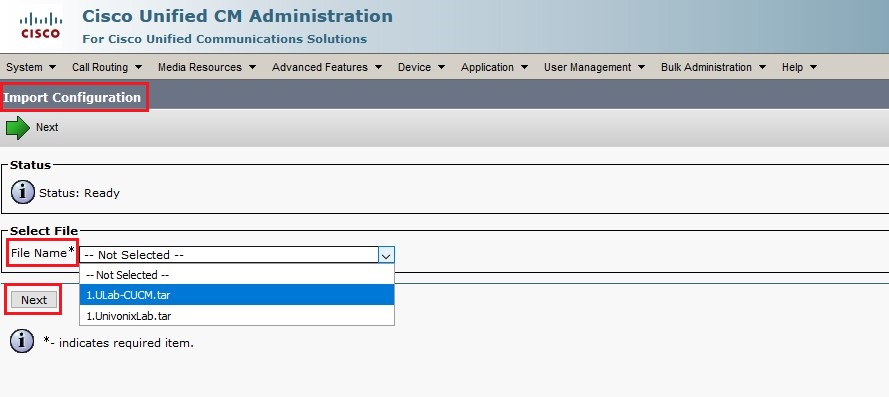
- From the File Name dropdown, select the side by side configuration file
- Click the Next button. The Cisco CUCM system will automaticly complete the instillation of the side by side configuration file