Create E.164 Extension Normalization Rules
Defining E.164 Normalization Rules
Microsoft Teams requires all phone numbers to be in the E.164 form. E.164 defines a general format for international telephone numbers that includes the country code, area code and a full phone number. In the configuration of many legacy PBX, the phone numbers are not configured per the E.164 standard. In many cases, only the extension number is configured and the normalization to an E.164 is done in the PBX dial plan. Sometimes the normalization is done in the gateways connecting the legacy PBX into the PSTN.
As part of the project settings, Univonix Migrate includes a tool to help you normalize the phone numbers from their legacy form into the E.164 standard. This allows you to create a set of rules that matches the various phone numbers and adds any missing elements to them. The tool will also test that the new numbers are created in the correct E.164 format. Normalization rules are implemented at the Source PBX level.
Each normalization rule is built from two parts:
- The Condition: controls which numbers will be updated by the rule. You can select the numbers per the routing partition (Cisco spacific) they belong to and/or by a certain match pattern, e.g. all 4 digits’ extensions that starts with the digit 2.
- The Action: adds the missing parts to the extension number, i.e. add country code, area code and prefix.
Defining E.164 normalization rules can sometimes be complicated, Univonix Planner includes a simulation mode, where you can test the impact of any normalization rule prior to saving it and applying it to all numbers.
Normalization Rule Workflow
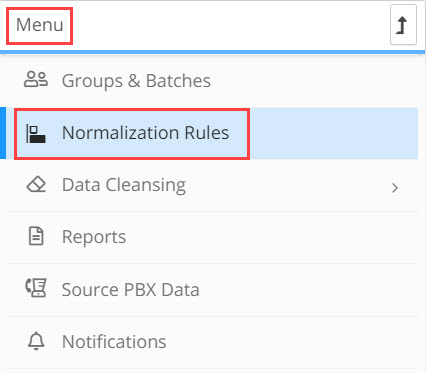
1. To open the normalization tool, from the Menu pain click, Normalization Rules.
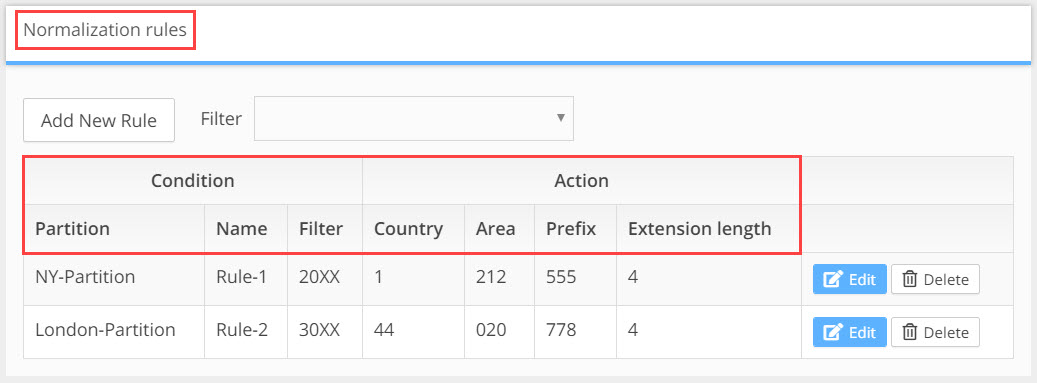
2. The Normalization Rules window opens, if this is your first time creating a Normalization Rule for a specific Source PBX migration, then the window will be empty. In the screenshot example below, there are two normalization rules already created, with their details listed under the corresponding Condition and Action columns, highlighted in the red box.
3. To create a new rule. click on the Add New Rule button.

4. The Add New Rule window opens, all of the fields, except Prefix are required to complete a new rule.
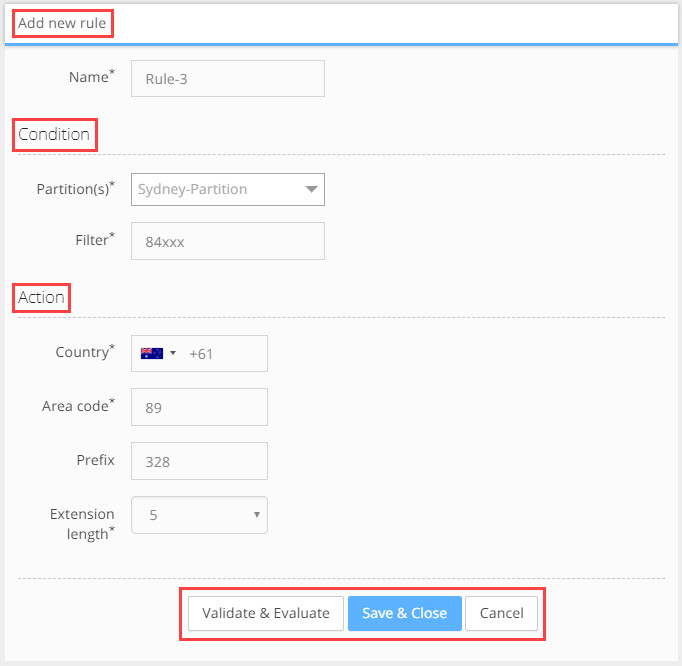
5. Name: enter the name of the rule, it is recommended to use a logical naming convention to help manage all the rules you will need to create.
6. Condition
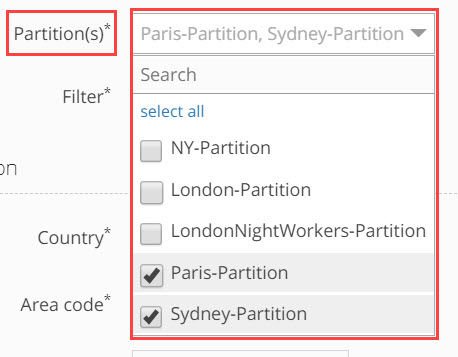
a. Partitions(s): from the Partitions drop down list select the partition you will use to create this rule. Partitions are relevant only where Cisco is the legacy PBX. The partitions listed in the drop down come from the PBX data that was imported from the legacy PBX. It's possible to select multiple partitions from the drop down list as conditions for your rule. If you select multiple partitions a separate normalization rule will be created for each partition.
c. Filter: In the Filter field enter the specific number combination you want to update with your rule.
The Filter field can accept a specific number, wildcard or special characters to create specific numbers patterns for your rule.
These include:
- X – The X wildcard (must be uppercase X) matches any single digit in the range 0 through 9. For example, the filter 22XX converts all 4 digit extensions starting with a 22 in the partition to a +1 (212) 555-22XX pattern. Using XXXX as the filter, converts ALL 4 digit extensions to a +1 (212) 555-XXXX pattern.
- [ ] – The square bracket ([ ]) characters enclose a range of values. For example: The pattern 813510[012345] matches all numbers in the range 8135100 through 8135105.
7. Action
a. Country: from the Country drop down list select the specific county dialling code that is relevant for the normalization rule. Only one country can be selected.
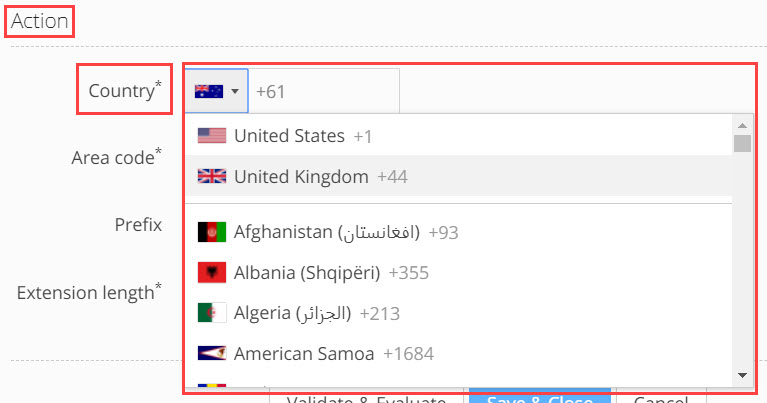
b. Area Code: enter an area code for your rule in the Area Code field.
c. Prefix: enter an prefix number for your rule in the Prefix field.
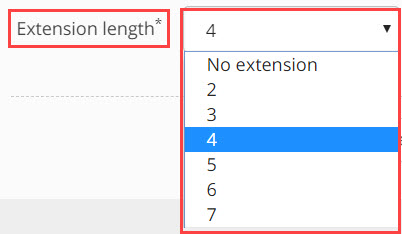
d. Extension Length: from the Extension Length drop down, select how many additional digits will be needed to add the extension number.
8. Additional Actions:
Cancel: to stop building the normalization rule, click the Cancel button. This will delete all of the parameters you have entered into the rule up to this point. The Add New Rule window will close and return you to the Normalization Rules window.
Save & Close: will save And Execute the rule, updating all the numbers to E.164 that meet the rule definitions. The Add New Rule window will close and return you to the Normalization Rules window.
Validate & Evaluate: will run a 'simulation' to test the normalization results before saving and updating the real numbers, click the Validate & Evaluate button, you will be able to test if the new numbers have been created in the correct format.
Validate & Evaluate Results Table
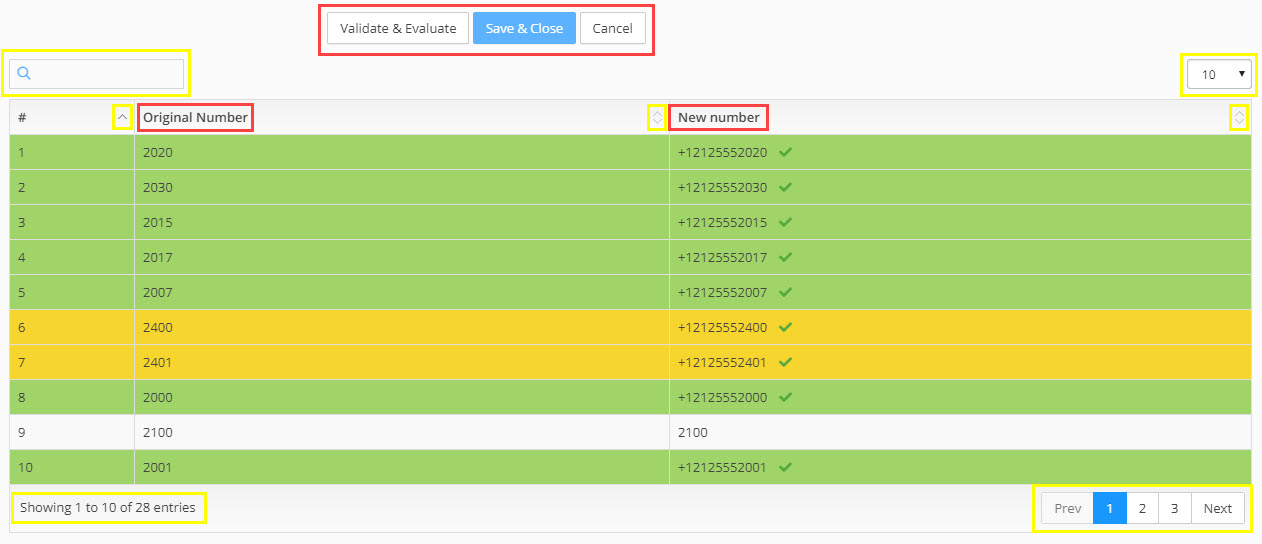
The simulated results will show all the numbers in the partition/s you selected in your filter. The table displays the results with the Original Number and the New Number side by side for comparison and evaluation.
The system validates the list of numbers for two issues:
- Which numbers in the partition/s from the legacy PBX match the rule
- Which numbers, when the rule is executed, will be E.164 compliant
Each result row will have one of three states designated by different colours:
- Green - The rule applies for this number
- Gray/White - The rule does not apply to this number
- Orange - This number has already been normalised by a different Normalization Rule
The Green Tick icon  to the right of the number means that this number is E.164 compliant.
Note: We recommend that you work to the E.164 standard. Technically the system will support creating rules that do not adhere to the E.164 standard! |
9. After you have evaluated the results you can:
a. Edit the rule parameters and click Validate & Evaluate again to re-test the numbers
b. Execute the rule by clicking on Save and Close
c. Stop working on the rule and delete its parameters by clicking on Cancel

Working With The Results Table
How Many Results: to know how many results you have in the current results set, look at the bottom left hand corner of the results table window. 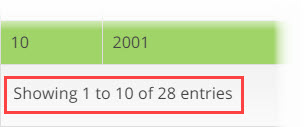
Search: search within the results set using the search field ![]() the search field is free text alphanumeric. The results table will update automaticity as you type in the results field.
the search field is free text alphanumeric. The results table will update automaticity as you type in the results field.
Columns: can be ordered by clicking on ![]() the column ordering icon which is found in the column header. Clicking on the icon will order the results in numeric value from lowest to highest. Clicking the icon again will swap the order and the results will be shown in numeric value from highest to lowest.
the column ordering icon which is found in the column header. Clicking on the icon will order the results in numeric value from lowest to highest. Clicking the icon again will swap the order and the results will be shown in numeric value from highest to lowest.
Results Per Page: you can change the number of table results that appear on a page by opening the results per page drop down and selecting a different number of results to see per page. There is a minimum or 10 and a maximum of 100 results per page. 
Navigating Between Pages: the number of table results may expand beyond the limits of a single page, to navigate to additional pages of results, use the page navigation bar in the bottom right hand corner of the results table page. 
To move to the next page or return to the previous page click on the Next or Prev (previous) buttons. To skip to a specific page, click on the page number button, of the page you want to skip to.
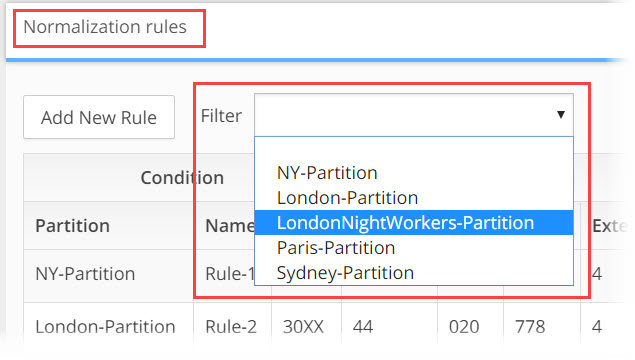
10. In the Normalization Rules window, you can filter the rules to be displayed by opening the Filter drop down list and selecting the partition you want to filter by.
11. In the Normalization Rules window, you can edit a rule by clicking on the Edit button. The rule will open in the Edit Rule window, which looks and operates the same way as the Add New Rule window.

12. To delete an existing rule, in the Normalization Rules window, select the rule and click on the Delete button at the end of the row.
