Create Batches & Groups
Working with Batches and Groups
When working with large customers it is recommended to use a phased migration approach. In each phase, a Batch made up of a group, or multiple groups of users is migrated from the legacy PBX into the new system.
- Univonix Migrate helps to effectively manage and coordinate phased migrations.
- The phone lines and users configured in the legacy PBX are 'logically' broken-down into groups using a set of filters.
- Most of the user related tasks performed in the Univonix Migrate application are performed at the group level.
- The Groups & Batches menu is where most of the System Integrator work is done. This is the place where the SI needs to manage and input information that the system was not able to update automatically. It is also the place where we will do bulk administration operations such as assigning user profiles, policies and licences and where we approve users for provisioning.
Basic Workflow:
Step 1: Create your batches > Step 2: Create your groups > Step 3: Attach your groups to a specific batch
Note: Migration takes place at the batch level so your batches and groups will need to be defined accordingly. |
This is just the beginning of the pre-migration process, before provisioning takes place you will need to:
- Run E164 Extension Normalization on the numbers/extensions on each line in the group.
- Resolve all open issues for each user/line in the group.
- Assign persona profiles to each user in the group, profiles can be assigned in bulk at the group level.
- Complete batch validation before migration starts.
System wide configurations, like Hunt Groups, Pick-up Groups and Call Parks are performed at the Batch level, outside the context of any group.
Creating Batches
The phased migration of your legacy PBX will be made up of multiple batches, it is recommended that your batches be created and organised to coordinate with your telephony project roll-out. For example, if the Outbound Sales Department from the London office are all due to be 'cut over' in the same week in March, then the cosponsoring Batch will be "Batch_March.2020" where one of the groups would be; "Outbound Sales Department London.HQ" This coordination is critical as the migration/cut-over should not take place until all elements of the project are in place, such as; network readiness, endpoints, user training etc!
To create Batches you must have a Migration Project and Source PBX already created in the system.
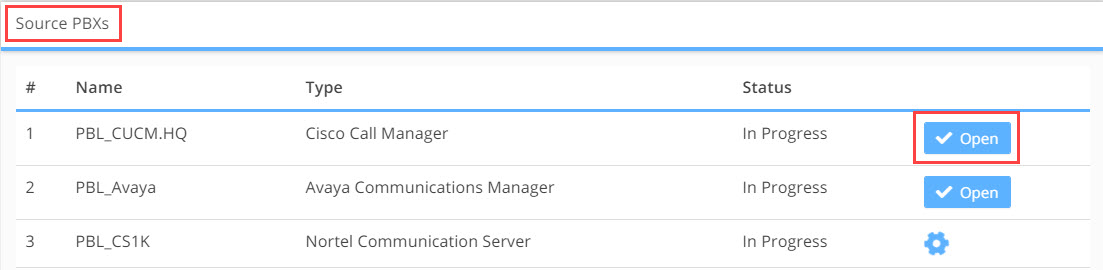
1. From the Source PBX window, Click Open next to the source PBX you are going to add the Batches and Groups to.
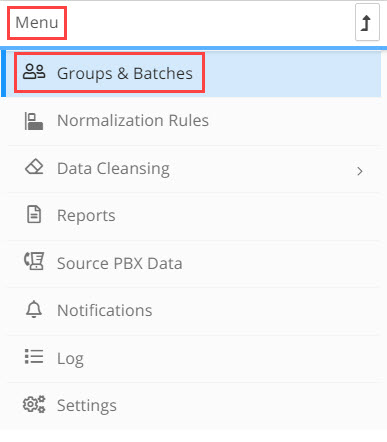
2. From the Menu pain select, Groups & Batches
3. The Groups pain and the Batches pain will open. If this is the first batch and group you are creating for this source PBX the window will open empty as in the screenshot below.
- In the Groups pain there is a default group called Other. The Other group will hold all the users in the selected PBX, but as users are filtered and added to groups the number of users in the Other group will decrease proportionally.
- A phone line can be assigned to only one group. If a phone line does not match any of the filters, it will stay assigned to the `Others` group. For example, when migrating from CUCM, the default set of filters auto-generated by the system, divides the phone extensions/lines per the ‘Location’ field assigned to each one of them. Not all users or phone lines have a `Location`, like `Extension Mobility' users from CUCM. `Extension Mobility' users can go to any location and log into a device and begin making calls from that device. These lines/users will be assigned to the Others group.
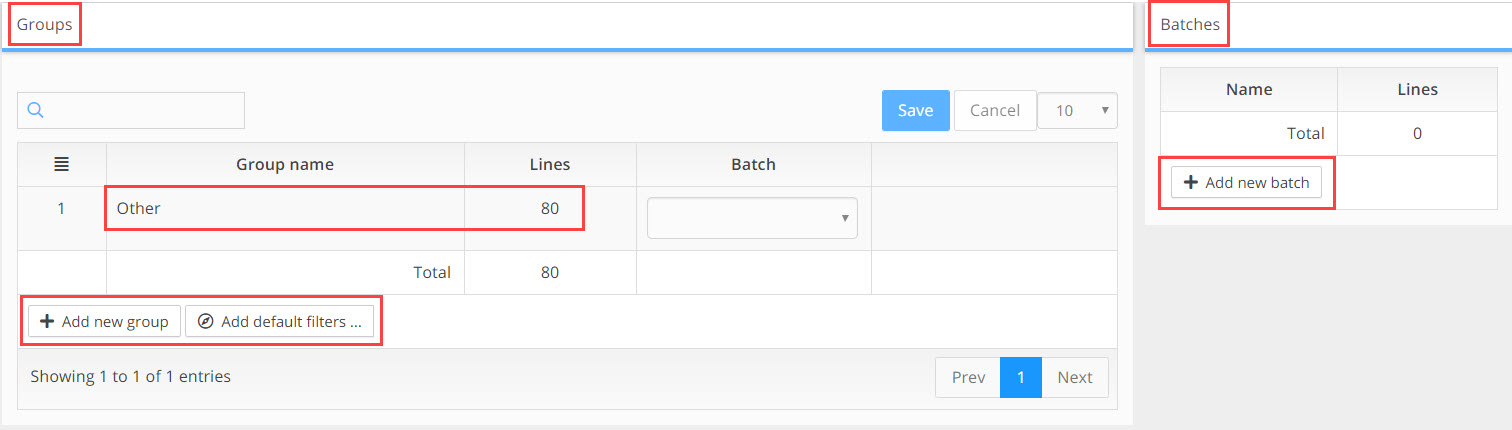
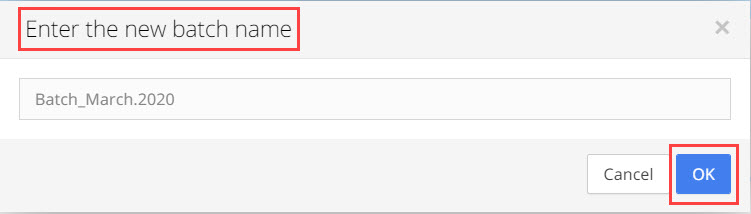
4. To create a new batch, click on the Add New Batch button in the Batches pain. A pop-up opens, enter the name of the batch. As mentioned earlier the batch name should reflect the time-frame for your telephony project role-out. Once you have entered the batch name, click the OK button.
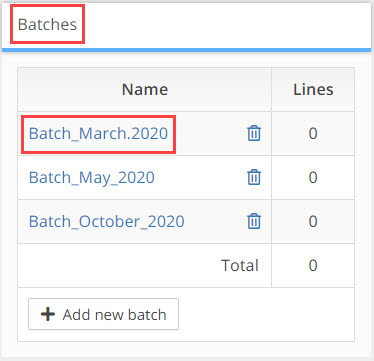
5. The new batch is added to the Batches pain and is immediately available to be attached to groups created for the same source PBX.
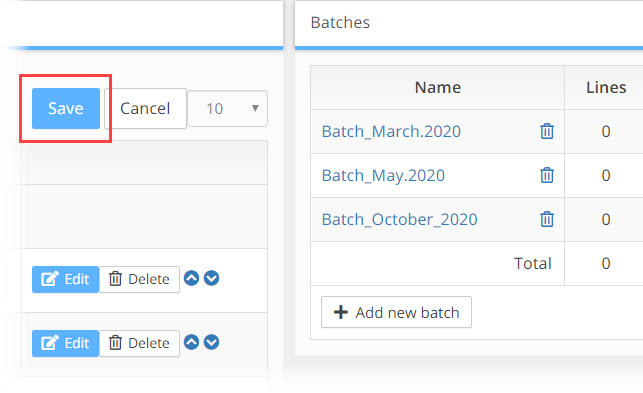
6. Click Save in the Groups pain for the changes to take effect and be saved in the system.
Creating Groups
In most legacy PBX's, lines and users are arranged in groups. These groups can represent a department, such as 'Marketing' or 'Sales', a geographical locations, HQ North Building’, 'New York Office', 'Tokyo Branch' etc, or any other grouping that the telephony administrator is using. For migration planning purposes, Univonix Migrate includes a mechanism to define migration groups. Once your migration groups are defined, the 'real' work of migration planning will begin.
There are two methods for adding groups:
a. Default Filters will automaticity add groups according to a default filter that you select. The default filters come from an analysis of the data file from the source PBX as well as data from the target PBX. For example, if users are organised by physical location in the source PBX then one of the default filter options will be this same data to crate groups.
b. Add New will open the group filters tools that will allow you to manually create a group according to the available filters.
At any point all groups and their group filters can be edited, updated and deleted.
Using Default Filters
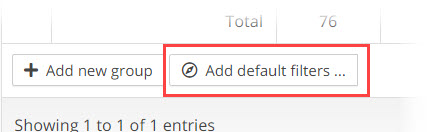
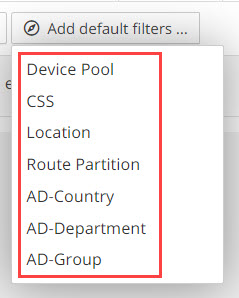
1. Click on the Add Default Filters button
2. A drop-down list opens of all the default group filter options available from the source PBX and target PBX data. In the example below the source PBX is Cisco and the target is Microsoft Teams, AD standing for Active Directory. Select one of the filters, Location.
3. Automaticity the uses are filtered into data defined groups, the Groups pain updates to reflect the new created groups. In the screenshot below you can see the result of selecting the Location filter for automatic grouping.
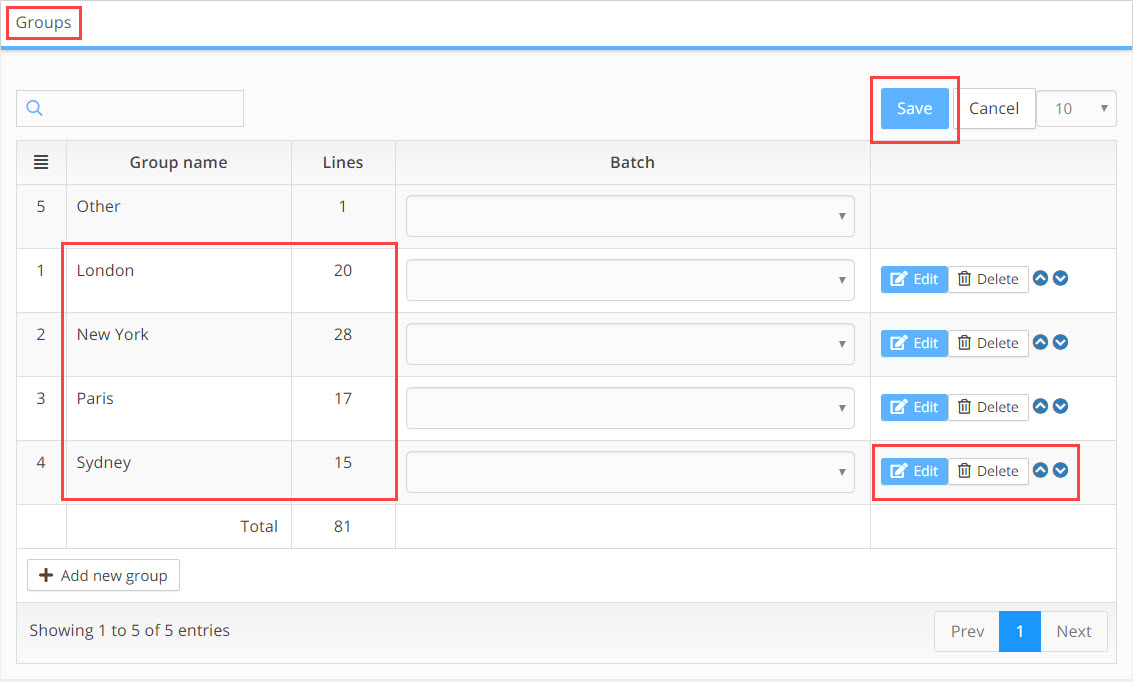
You can see that the Lines for each group have updated, each line represents a user or an endpoint. The default Other group now only has one line, all other lines have been filtered into their respective groups.
4. Click Save in the Groups pain for the changes to take effect and be saved in the system.
5. To edit the default group, click the Edit button. The Group Filter window will open. (This window will be covered in detail in the next section)
6. To delete the group, click the Delete button. A warning pop-up appears, click OK to continue to delete the group. Be aware, there is no 'undo' in the system!

7. The Priority of groups can be manged by clicking on the up or down arrows ![]() next to that group. This can effect the number of lines in a group. Groups that are higher in the list, take 'priority' over groups that are below them. So if a user or line matches the filters of multiple groups, they will be placed only in the group that is highest in the list where they first match the filter.
next to that group. This can effect the number of lines in a group. Groups that are higher in the list, take 'priority' over groups that are below them. So if a user or line matches the filters of multiple groups, they will be placed only in the group that is highest in the list where they first match the filter.
Using Add New Group
Using Add New Group will allow you to manually create and configure groups by building your own customised set of filters.
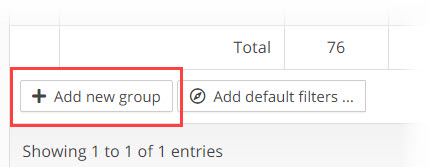
1. In the Groups pain, click on +Add New Group button.
2. The Group Filter window opens.
Filter Name: type in a name for your group, we recommend something descriptive that will aid in managing your multiple groups.
Description: in the description field add details about the group that will make it easy for others to understand what the group is and who should be in it.

3. A group filter is created by using a combination of Conditions and Expressions on the data imported from the legacy PBX.
+ Add New Condition: A condition is made up of one or more expressions, a group filter can have multiple conditions. The operator between multiple conditions is 'Or'
+ Add New Expression: An expression is a specific piece of data that we can manipulate with an operator to filter out a specific sub-set of users. A condition can have multiple expressions, the operator between expressions in the same condition is 'AND'
Each filter is identified by a unique name (mandatory field) and at least one condition. The phone line is matched to a filter if at least one of its conditions matches. A line is considered to match a condition if it matches all of its expressions.
Each expression is built using the following form: <field> <operation> <value>
Field |
An attribute assigned to a phone line. The list of available fields depends on the source PBX. e.g. for CUCM the following fields are available: Location, Device Pool, CSS, Route Partition and Number. |
Operation |
Can be one of the following: Equals, Not Equals, Starts With, Patten, Range, By File. Depending on your selection this may update the functionality of the Value field! |
Value |
The available values depend on the chosen field. After selecting a field, the list of values is updated per the configured values in the uploaded configuration. You can either select one of these values or enter a free text. |
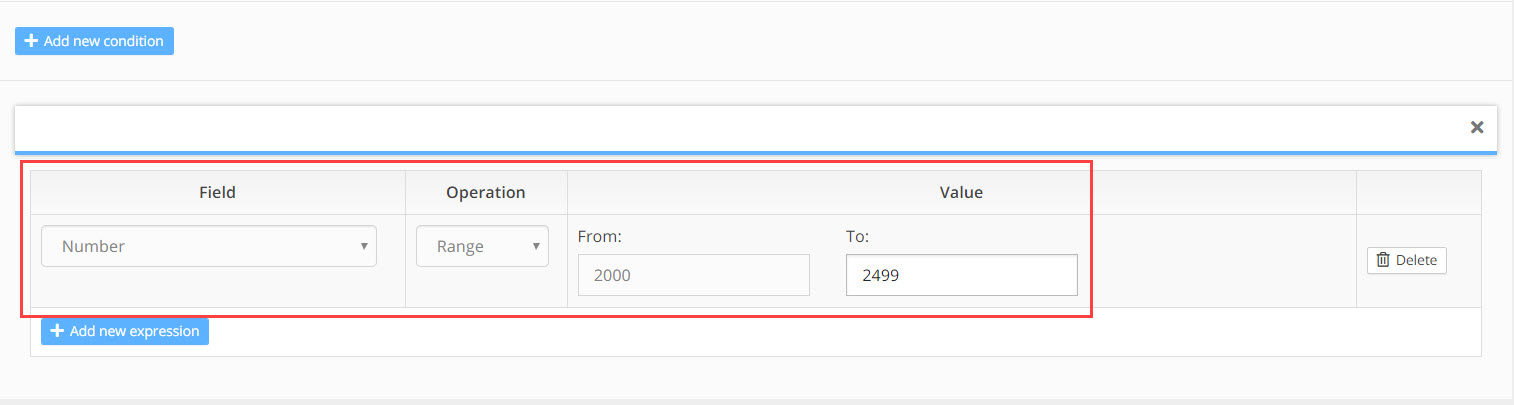
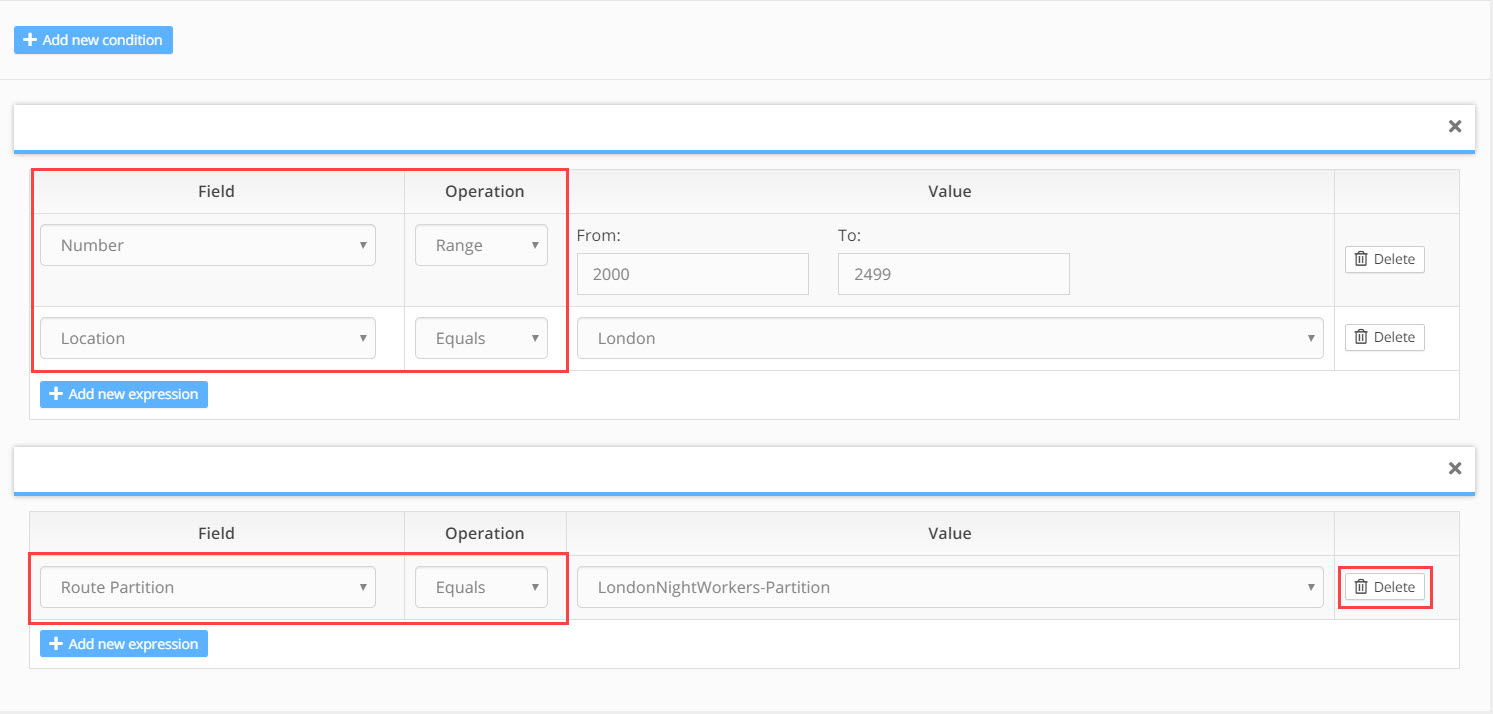
Example 1:
In the screenshot below we have one Condition with one Expression. The expression will filter all those users/lines where the number is between the range of 2000 to 2499. Any user or line that fits that expression will be added to that group.
Example 2:
In the screenshot below we have two conditions, the first condition has two expressions and the second condition has one expression. In this example the first condition will filter all those users/lines where the number is between the range of 2000 to 2499 AND the location is London.
In the second condition all those users/lines that are in the route partition LondonNightWorkers-Partition will be included in the group
So any user or line that fits the first condition OR that fits the second condition will be added to this group.
4. To remove an expression click on the Delete button at the end of that expression.
To remove a condition click on the delete icon ![]() in the top right hand corner of the condition pain.
in the top right hand corner of the condition pain.
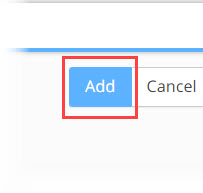
5. To save the group filter, click on the Add button in the top right hand corner of the Group Filter window.
6. The system will close the Group Filter window and return to the Groups window where you will see the group you have just created added to the list of groups that are now part of
Source PBX you are walking on. The list will also show you how many Lines (uses/extensions) have been included in that group.
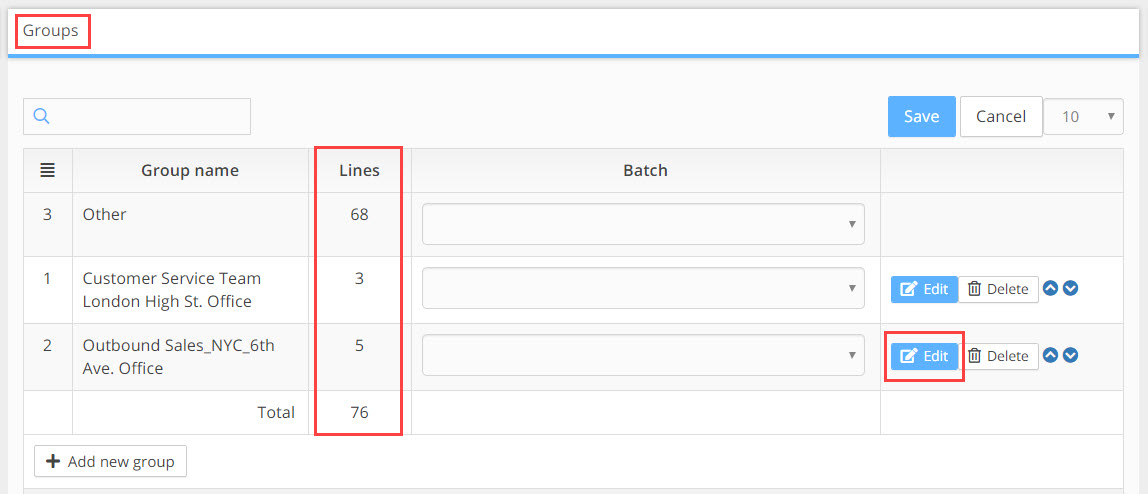
Note: Lines that do not belong to any of the defined filters will be put into a special group called “Other”. The Other group can not be deleted or re-ordered. |
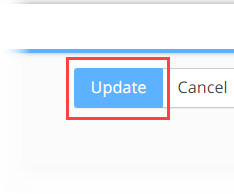
7. To change a groups filters, click the Edit button for that group in the Groups window.
The Group Filter window opens showing the conditions and expressions for that group. Make your changes and click the Update button in the top right hand corner of the Group Filter window, the changes will be saved and the number of Lines for that group will update.
Adding Groups to a Batch
1. Each group can only be added to a single batch. To add a group to a batch, go to the Groups window and in the Batch column select the group you are going to add and click on the Batch drop down list.
2. From the drop down list, click on the Batch name you are going to add the group to, the batch name will be added to the Batch column next to the group. There is no limit to the number of groups that can be added to a single batch.
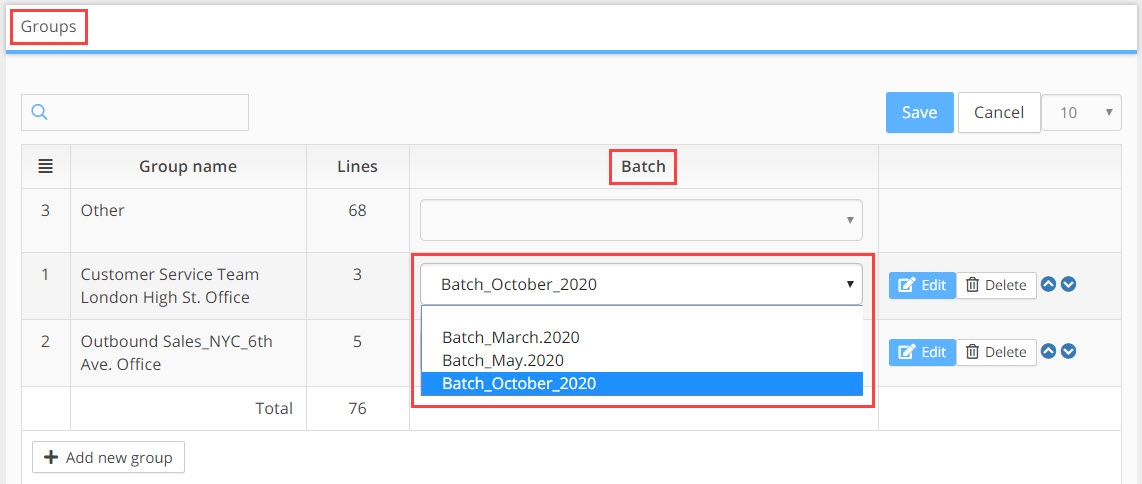
3. Click the Save button in the top right hand corner on the Groups window.