System Navigation
The Univonix system is simple and intuitive to navigate. The majority of screens in the system are broken into 4 key screen areas.
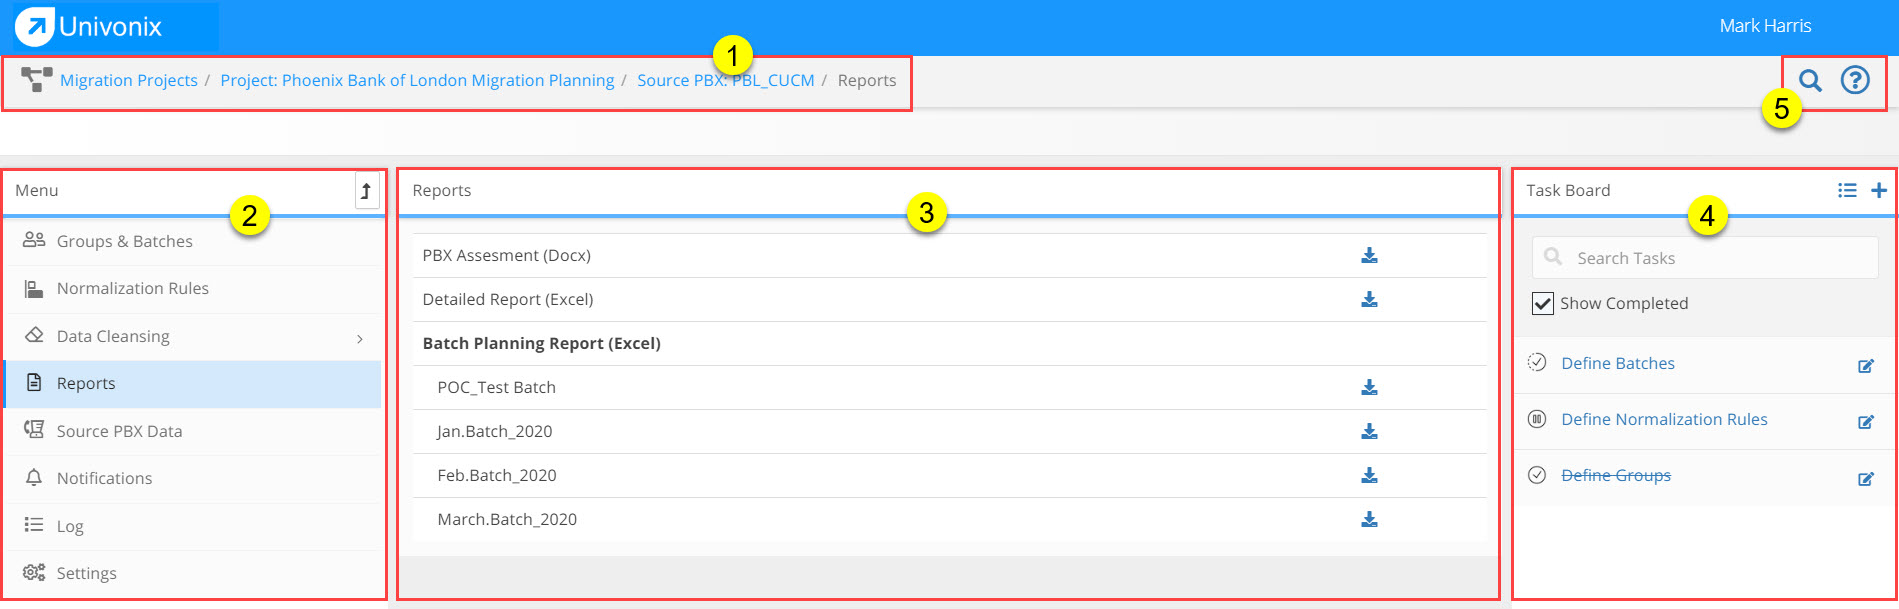
1. Bread Crumbs / 2. Menu Column / 3. Actions Area / 4. Task Board / 5. Search & Help
Description of Key Areas (each area is covered in further detail in the user guide)
Bread Crumbs: The bread crumbs leave you a clear path to where you are in the application and what you are currently working on, which project, source PBX, batch etc. At any point you can click on the text header in the bread crumbs to jump back to that point in the applications.
Looking at the screenshot above you can easily see that we are currently doing Device Mapping on the PBL CUCM London HQ source PBX that is part of the Phoenix Bank of London migration project!
Menu Column: The menu column is your 'tool box' and holds all the tools you will need to complete your migration project. Use the 'level up' ![]() icon to navigate up a level in the application hierarchy.
icon to navigate up a level in the application hierarchy.
Actions Area: When you select a specific menu item the Actions Area updates and presents the tools and workflow you need to follow to complete that task.
Task Board: Depending on what menu item you select, the task board will update to reflect the specific tasks you need to complete for that menu item. You can manager the status of each task, assign tasks to specific users and even add your own tasks. The Task Board will help you manage and complete the project by listing all the key tasks that need to be done to deliver a successful migration.
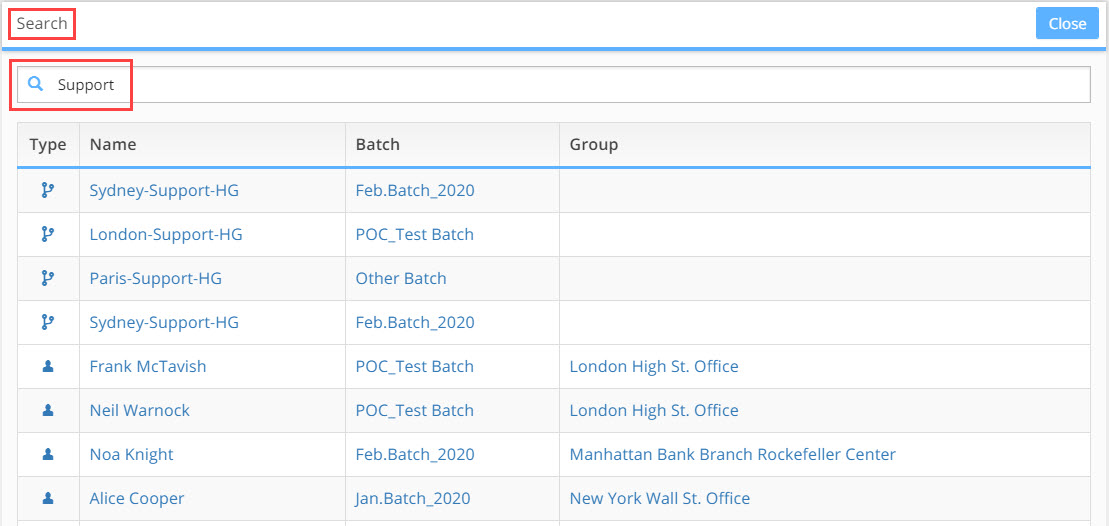
Search:  Opens a search window that enables you to run a top down search across all the batches/groups/users & devices within the Source PBX you are working on.
Help: ![]() System Help is a searchable HTML interface that provides detailed information about all the systems features and functionality.
System Help is a searchable HTML interface that provides detailed information about all the systems features and functionality.